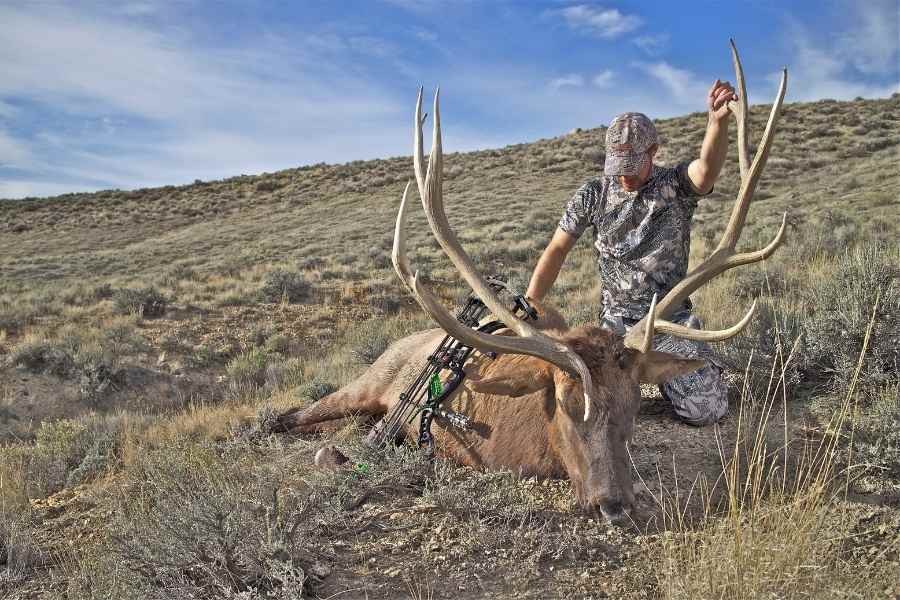

You have efficiently scouted during the summer months, positioned your deer stands in superb locations, and put in your time on the stand in a relentless fashion. All of this diligent preparation and hard work has culminated in this singular climactic moment as you stand afield, viewing your successful harvest. However, as victorious as this moment is, the real work now begins.
Your deer now begins its journey from the field to the freezer. This starts by successfully field-dressing your deer. If this is a task you have completed in the past, you will carry on in a typical fashion. If this is a process you are not accustomed to, you are likely left wondering how to field dress a deer.
The process of field dressing a deer is not an overly difficult task to tend to, and the following steps will make completing the task at hand a breeze.
So ready your cleaning knife and read on. We are about to get down to the bare-bones details of how to field dress a deer.
Steps To Field Dressing Success
Field dressing is the process of removing all internal organs from the body cavity of your successfully harvested deer.
This reduces the transport weight of your deer while also efficiently cooling your meat, thereby decreasing the risk of spoilage.
read.. can you transport deer meat across state lines
With a certain amount of experience, field dressing a deer can be completed in a relatively trouble-free fashion and with little expenditure of time. The following steps will allow you to thoroughly and efficiently handle this chore.
Gather The Tools Of The Trade
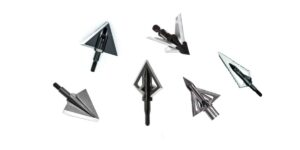
Before you can begin field-dressing your deer, you must gather all the needed tools to complete the process (relatively few items are required). Your main item of concern will be a sharp knife (read here how to make a knife yourself!)
You will need to choose a knife that is not only sharp but of a size that you can manipulate skillfully.
Oversized knives tend to be overkill in this situation and can be pretty cumbersome to use efficiently. Several purpose-specific skinning knives exist on the market and are well worth the money.
Other than a knife, the only other item that will be of use will be a pair of latex gloves if you choose to use them.
The use of latex gloves, while not mandatory, is highly advised, as this presents a barrier between your skin and any potential diseases that the dressing process could expose you to.
If you have not recovered your broadhead yet, it might still be inside the deer! So be careful when you start to field dress the deer (read.. size of deer´s kill zone)
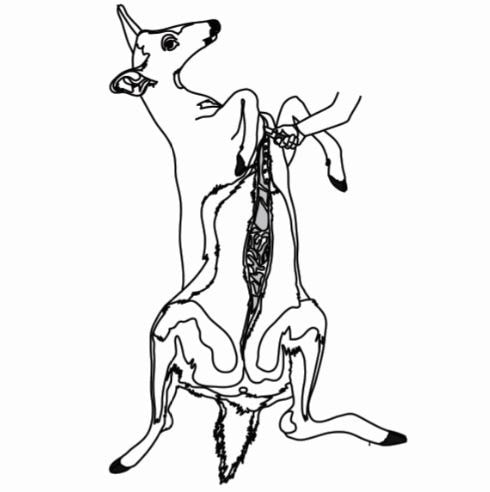
1. Position Deer As Needed
You will begin the field dressing process by placing the deer into a conducive position to unobstructed maneuverability.

Take the deer and roll it onto its back, with the white of its stomach facing upward.
Once this is complete, take the deer’s rear legs and spread them outward to create ample workspace.
This can be completed quickly with the assistance of a second individual or can be done in an alternative manner by tying the deer’s legs off to nearby objects, such as trees or other brush.
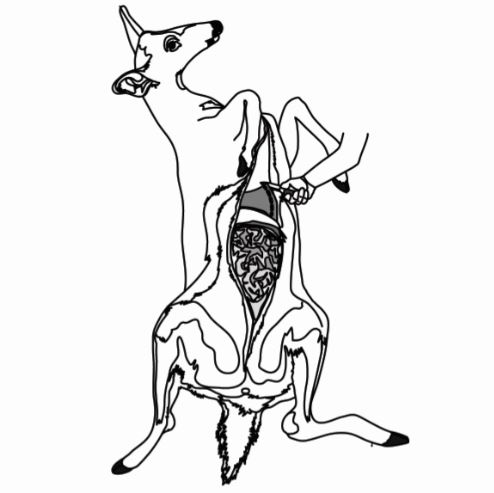
2. Free Rectum From Carcass
You will now make your initial cut by working around the rectal canal of the deer circularly. It is often helpful if you make an initial light cut that outlines the area you intend to cut.
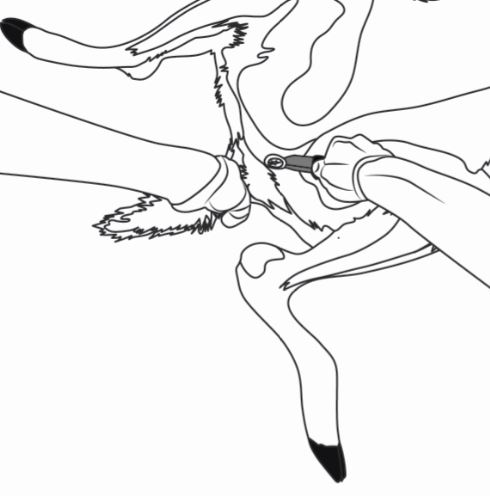
This freshly cut hide will serve as a template from which to proceed. You have now outlined an area around the anus and will proceed by cutting deeper into the pelvis along this initial incision.
A depth of two to three inches is ideal, as this frees up the end of the colon for removal with the rest of the body cavities contents.
3. Open Body Cavity
You will now make an incision from the forward-most point of your cut around the rectum, moving in a straight line toward the deer’s sternum. It is crucial to cut no deeper than necessary to slit the hide and into the body cavity.
If you cut too deeply when making this incision, you will puncture the paunch, spilling stomach contents into the body cavity.
Your incision will open the deer’s body cavity from the anus to the sternum, exposing the internal organs that must be removed during the following steps.
It is important to know the game laws in your area, as some states stipulate that sex organs must remain on a carcass for identification purposes until it has been removed from the field.
If this is not the case in your state, a simple severing cut will remove such body parts as you make your incision into the cavity.
4. Cut Diaphragm, Trachea, and Esophagus
You now have the body cavity open and will proceed to remove the contents within. Start by reaching into the forward portion of the deer’s body cavity while feeling for the esophagus and trachea.
You might find it helpful to pull slightly downward on the contents of the body cavity, as this will provide a level of tension that will make the identification of the trachea and esophagus less difficult.
Now make a complete cut through the trachea and esophagus. Once this is complete, pull upward on the contents of the body cavity to locate the diaphragm.
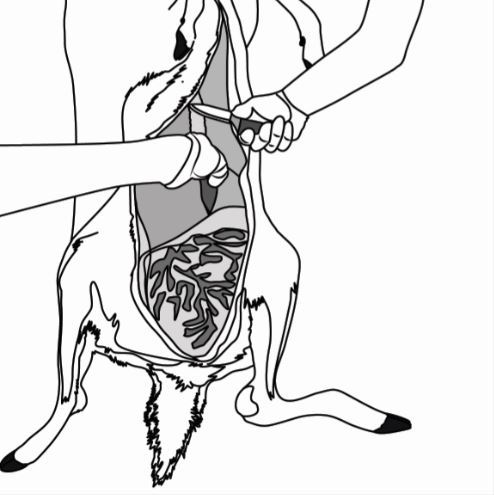
This will be the connective tissue between the organs and the cavity wall. Severe the diaphragm completely, freeing the bulk of internal organs.
5. Remove Organs
Pull outward on the organs within the body cavity, simultaneously rolling them toward one side of the incision.
If you find resistance when removing the contents of the body cavity, reach into the void between the mass of organs and the cavity wall while cutting any remaining connective tissue.
Once the bulk of the cavity’s contents have been removed, tug slightly on the lower end of the large intestine as necessary to pull the rectum through the incision you previously made during step one. Make any last cuts needed to free the organs, and then lift them free of the body cavity.
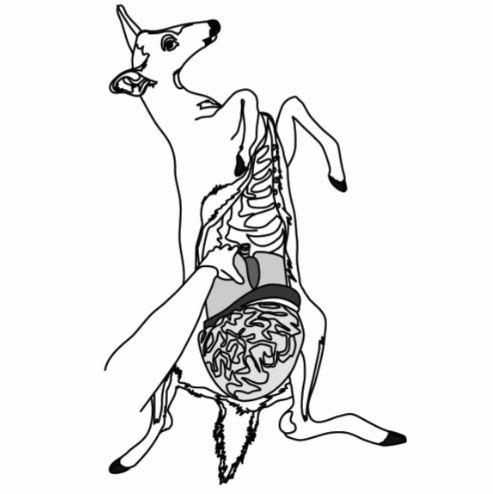
6. Drain Body Cavity
Now that you have successfully removed the internal organs from the body cavity, all blood should be drained as thoroughly as possible. This is best accomplished by rolling the deer on its side.
Facing the cavity’s incision at a downward angle on a hillside slope can yield an extra benefit.
Allow several minutes for a maximum amount of blood to drain, and check the quality of your work before removing your deer from the field.
read.. preparing a deer skull “Euro Mount”
Field Dressing Simplified
Field dressing your harvest does not have to be difficult nor strenuous. Through careful planning and attention to detail, you can complete the task at hand with relative ease.
By prepping the tools of the trade, separating the points of connection between the trachea, esophagus, diaphragm, and rectum, removing the body cavity’s contents, and draining it thoroughly, you can field dress your deer in a matter of minutes.