
Special Thanks to Sam Harper for allowing us to republish his tutorials and build along instructions. His expertise and knowledge in the bow-making field have greatly benefited many readers, and we are grateful for his generous permission.
Today is Wednesday, July 20th, 2005. I have been wanting to make an English longbow for a long time. A guy on eBay asked me to make him one, and although I was not up to making him one, the thought of it has motivated me to go ahead and try one. Join me on this great adventure.
A Little About English Longbows
I don’t know a whole lot about English longbow history, but I do know that there was a time when every Englishman was required to have one by law so that England could be protected from invasion.
(Before I go on, I should note that I’m getting a lot of this information from the Traditional Bowyer’s Bible, volume I. I’m not giving specific references, because I’m too lazy to look them up.)
Since so many bows had to be made, the English came up with a way to get the most bows out of a piece of wood.
Instead of having wide flat bows, they had narrow bows with a D-shaped cross-section. Notice how with this design you can get more bows from a tree.

Notice that with the English Longbow, less wood is wasted. It’s supposedly also faster to make ELB’s than flat bows, because you’re just taking wood off the edges. That allowed bowyers to crank out bows in a shorter amount of time.
The only problem with this design is that it puts a lot of stress on the belly of the bow. You see, with a regular flat bow, the compression forces are distributed along the whole width of the bow, but with the ELB, the compression is concentrated at the crown of the D on the belly.
There are a couple of ways the English dealt with this problem. First, they made their bows longer than usual–at least the height of the archer if not longer.
That way, the bow didn’t have to bend quite as much for a given draw length. Second, they used Yew.
Yew is unusually strong in compression. Of course Yew isn’t the only thing they used, but it was perferred.
Thinking the Whole Thing Through
I want to mimic the ELB as far as I can, but alas, I’m a starving college student who lives in an apartment and can barely afford to feed my cats.
Yew is heinously expensive, so that’s out of the question. What I need, though, is something that can withstand the compression forces of a D-shaped bow.
It just so happens that Osage (i.e. bois d’ark) is perfect for this kind of thing, and it isn’t nearly as expensive at the Hardwood Barn which is close to me.
I’d also like the bow to at least look a little like a Yew ELB. Yew is sort of brownish tan, and the sapwood, which is left on, is white.
So I need some kind of backing that is white. Well, Hickory jumps immediately to mind. It’s pretty popular for backings, so I figure it will work fine.
Osage isn’t exactly the color of Yew, but it does get darker with age, so maybe it will look like Yew in 15 years or so. Anyway, it’s the best I can do.
Preparing The Hickory Backing
Whenever I’m trying to do something new, I try to do it with wood I don’t mind losing in case things don’t work out. I happen to have a piece of hickory 1/8″ thick, almost 2″ wide, and about 5′ long.
The obvious problem here is that the hickory is too short. I need it to be at least 6′ long.
One solution might be to rip it straight down the middle and splice the two pieces together. That would give me plenty of length.
The problem is that it wouldn’t give me enough width. The Osage I’m going to use is about an inch wide, which I think will be fine.
But if I rip the hickory down the middle, the two slats will both be less than 1″ wide because (1) the hickory is a little less than 2″ wide already, and (2) I’ll lose a little width to the kerf of the bandsaw.
Instead of ripping the hickory down the middle, I can rip it at an angle. I’ll measure half an inch on both ends, draw a line connecting them, and cut along that line.

Then I can splice the thick ends together, creating one piece that’s already tapered for glue-up.

Brilliant, I tell you! I’m such a genius!
Before I rip it, though, I want to grind it a little thinner than 1/8″.
August 6, 2005
But before I grind it, I want to cut it to size–about half the length of the bow. Why grind 5 ft of hickory when I could grind 3 ft?
That’s not to say I’ve decided on a 6 ft bow. I’d really like it to be 6.5 ft or so. I’m limited by the size of my hot box, because I’m using Smooth-On epoxy. I suppose I could make a longer bow if I used Urac, because then I wouldn’t need a hot box.
The inside length of my hot box is about 75″. I can get 76″ if I put the bow in diagonally. That’s almost 6.5″. If you think about it, though, the bow will be a little longer once I put the horn (or antler) tips on the bow.
But anyway, I’m going to cut the hickory down to 40″ long, and then grind it, and then cut it.
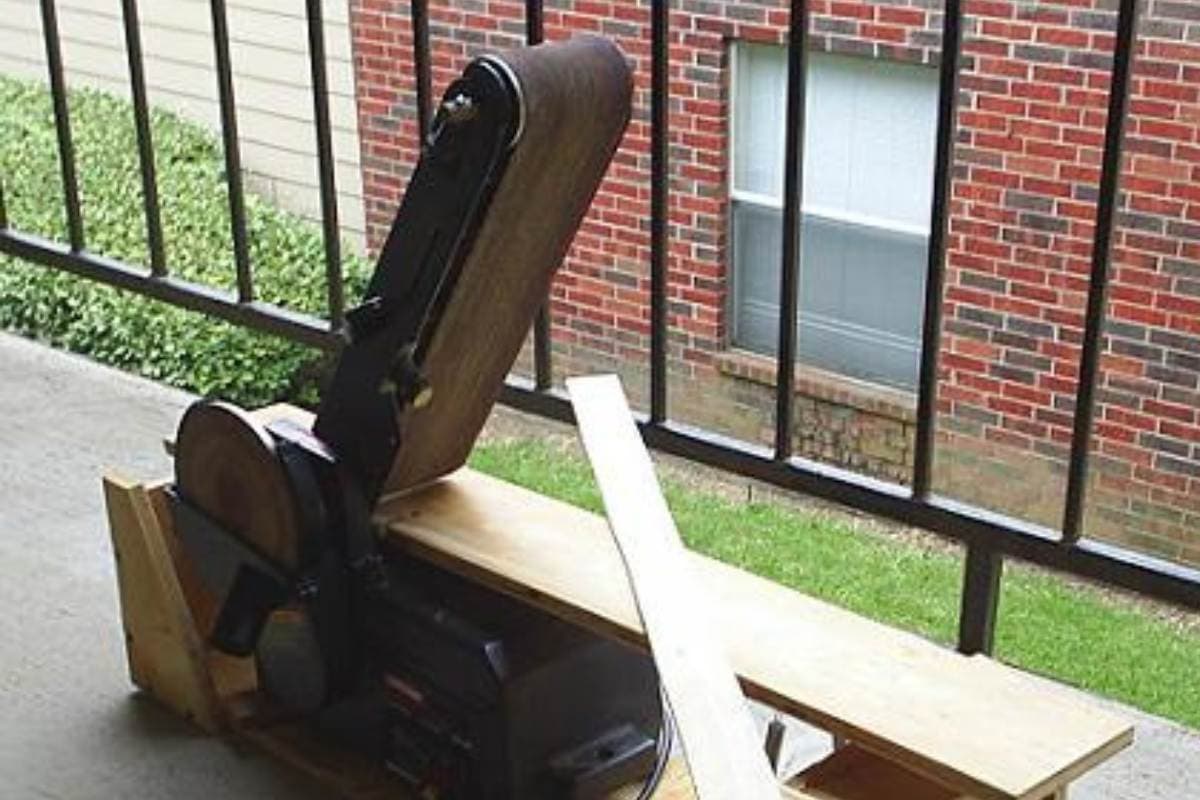
Here’s the 40″ piece of hickory sitting on my handy dandy lam grinder I made out of a belt sander. Cambo, from the Leatherwall, taught me how to do this.

After grinding it down to somewhere less than 1/8″ (I don’t know how thin it is), I measured 1/2″ on both ends.

I used a board for a straight edge, connected the dots, and cut along the line with my band saw. “They” say that when you mark a line and cut with a band saw, you should cut outside the line and then sand down to the line.
But in my case, I’m using the wood equally on both sides of the line, so I just cut through the line as well as I could and then sanded to get the imperfections out. Here are the lams.

The backings will be joined at the handle, and I want them to sort of fit together, so I used my disk sander to grind them.

By holding them together like that, I don’t have to measure angles or anything. It automatically grinds them both at the same angle. The only difficulty is that unless you hold it just right, you can get this problem.

Do you see the problem here? To fix this problem, I just grind, stick them together to check the fit, and then grind again. By the third try, they fit perfectly.

The whole reason I cut the lams 40″, knowing the bow would only be about 75″, is to give me some room for error. I could’ve messed up an end of the hickory while grinding.
I could’ve messed up an end while sanding at the cut. I might’ve sat there grinding the joint all day, never being able to make it fit. Anything could’ve happened.
Once everything seemed to be as it should be, I cut the tips off such that when placed end to end, it all comes to about 75″. That leaves them a little wider than 1/2″ at the tips.
The next step is preparing the osage.
Preparing The Osage
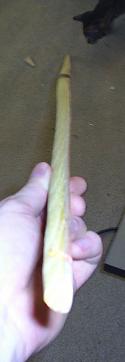
Here’s a picture of the Osage I’m using.

I’ve had this for a long time, thinking some day I’d make an ELB out of it. It was about 8 ft long. Today, I cut it down to 75″ and sanded the back side to prepare it for gluing the hickory on.
Before I do the glue up, though, I want to taper the belly some. I think it will be easier to taper the belly before glue-up because I plan to glue in a little reflex.
August 9, 2005
Here’s a look at the width and depth.

It looks like it’s a little more than 1″ wide, and a little less than 1.25″ thick. That is just fine with me.
Before doing any tapering, I had to make some pencil marks on the bow, and the first thing I wanted to find was the center where the handle will be. I do that without actually taking any measurements at all.
I just put the yard stick flush with one end of the bow, and make a mark at the other end. Then I put the yard stick on the other end of the bow and make another mark.

Now I’ve got two marks sorta close to the middle. Now all I have to do to find the middle is find the half way mark between these two marks.

I can do this in a matter of seconds without even thinking. It even works if the bow is shorter than 72″. As long as the two lines are within 12″ from each other, it’s easy to find the midpoint with a ruler.
I like to leave myself a little wiggle room on the handle, so I mark 5″ on either side of center and taper from there. That gives me 10″ of handle, which is plenty of wiggle room.
This is how I want to taper:

Ordinarily what you’d do in a situation like this is make two marks and use a straight edge to connect the marks.

But it isn’t that simple with my piece of osage, because one end has a slight backset. Do you see the problem here?

To truly get the end with the backset tapered the same as the straight end, I can’t use a straight edge to draw the whole line.
Instead, what I did was mark the straight end at intervals of six inches. I measured from the back to the line on the straight end, and whatever I measured, I marked the warped end the same.
Then I used a ruler to draw my tapered line on the warped end.

This way, both ends are tapered the same.
After I got it all measured, and the lines drawn, I cut it out with the band saw. I love power tools. I used to do this with a Stanley surform rasp, and it took me an hour, and left me plum worn out.
After the band saw, I used the belt sander to sand down to the line. Here’s a before and after shot.

Now, I don’t worry if I sand perfectly to the line or not. The purpose of all this roughing out is just to make tillering easy later on.
Once you start tillering, whatever imperfections you had will be taken care of. The whole idea of a “rough” shape is that it’s rough. It doesn’t need to be exact.
But in case anybody is wondering, I tapered down to 5/16″. 1/4″ seemed too thin, and 3/8″ seemed too thick. 5/16″ seemed just right.
The only reason I measured is just so I could get the same measurement on the other side and tell you what I measured.
When I’m not doing a build-along, I don’t even think in terms of 1/4″, 5/16″, or 3/8″. I just see what it looks like on the ruler and replicate it on the other end. That way, both ends are the same, regardless of the precise measurement.
And I don’t use a formula or preconceived notion of what the original measurement ought to be. I just use my eyeball and see what looks right.
The Glue-Up
Before gluing anything up, I want to first make a few pencil marks so everything comes out hunky dory. Specifically, I want to make sure that the bow is straight. Here’s how I do that.
First, I find the dead center of the bow. I’ve already marked the midpoint on the belly of the bow, so I just wrap that line around to the back of the bow.
Then I want to find the center of the width. That is easily done using a ruler. Now I’ve got a cross at the bow dead center on the back of the handle.

Next, I lay a string along the back of the bow and hang weights off the ends. I used squeeze clamps, because it requires no tying.

I make sure the string runs straight through that center mark I made. Then I try to get the string to hit about the same place on either end of the bow.
Once that is done, I make a mark at either end of the bow where the string is.
Some people just draw a line all the way down the back of the bow, but I don’t think that’s necessary. All I need to get the backings right is mark the center of each end of the backing.

Then when I glue everything up, I make sure the mark on the backing lines up with the mark on the end of the bow.
August 11, 2005
This morning, I glued up the bow. In fact, it’s in the oven right now. Before gluing it up, I did a dry run. I clamped the bow up just as if it had glue on it to make sure I had all the clamps I needed where I wanted them.
That way I avoided panic later on while actually using glue.
I used a 2×6 to glue the bow on. I put stands under the board so I could put clamps under it where the handle goes. I put in a little reflex so that when I tiller later on, there won’t be any (or much) string follow.
Hopefully, after tillering, the bow will be straight. Here’s the bow all glued up.

That’s Aristotle checking everything out to make sure I didn’t botch it. Notice that I wrapped everything up in saran wrap.
That keeps the glue off the clamps, me, the board, and everything else. I probably should’ve put tape on the hickory backing to keep glue off of it, but I didn’t.
I also should’ve wiped everything down with acetone before applying the glue, but I didn’t.
To apply the glue, I used this handy dandy doohicky and put glue both on the Osage and on the hickory.

It’s a seam roller I got from Lowes. This is the first time I’ve used it, and it makes gluing a lot easier than the way I used to do it.
I used to use a paintbrush with the bristles cut short so it would be stiff. Before that, I’d just use a wedge of wood.
Here’s a closer look at the handle.

I put those two pieces of wood under the handle so I could put the clamps between the bow and the 2×6 farther out. It also helps regulate how much reflex I put in the bow.
Before putting the clamps on, I wrapped tape around everything in six different places. That helped to keep everything from sliding around while I put the clamps on.

My hot box gets to about 160°F, and I usually leave bows in there for six hours. Gluing is my least favorite part of making a bow.
Roughing It Out
I thought for sure that when I got off work this morning, I’d be able to spend all day making bows. But sleepiness overcame me, and I didn’t get started till about 5:30 PM. That’s okay, though. There’s always tomorrow.
Last night before going to work, I unwrapped the bow. Here’s the spring back I had a few minutes afterward.

And here’s how it looked.

I cut out the excess with a band saw.

Today, I cleaned it up with my belt sander. Here’s how it looked after cleaning it up.


At this point, I came to the realization that I had not tapered the Osage thin enough. I should’ve gone with 1/4″ after all, instead of 5/16″. That’s okay, though. I can thin it down some more with the belt sander.
But before that, I want to rough out the “D” shape. Here are my instruments of destruction–a belt sander, a Stanley surform rasp, and a couple of wood rasps.

And here is my strategy for roughing it out. First, I just want to take off the corners. I’ll do that with my wood rasp, because it’s quicker. I’ll do the rest with the belt sander.
I also want to radius the edges on the hickory backing so it will be less likely to lift a splinter later on. I guess that means the surform doesn’t get to play today.

Here’s how I hold the bow while rasping it.

That’s right; I just clamp it to the chair and rasp between the arms. Then I move it over to rasp some more.
I wasn’t sure how to take a picture so you could see the shape of it, but this was the best I could come up with.

The “D” is not as steap all over the bow as it is at the tip. It will be even more shallow as I thin the limbs while tillering.
I didn’t round out the handle all the way. The handle is thin enough as it is. The bow will bend in the handle, and I don’t want it to bend more than necessary.
I just rounded the corners so it will be comfortable enough to hold.
Speaking of the handle, remember this?

If you think about it, that joint could easily come loose if the handle bends, and that would lead to a very unhappy Sam.

But I’ll deal with that tomorrow. Also coming up, I’ll show you my secret weapon for tillering. You will all want to run out and get one.
Protecting the Backing Joint
To prevent an unhappy Sam, I wrapped the handle area in fishing line so as to cover the joint. According to what I had read, you should use braided fishing line, and that’s what I did.
Why it should be braided, I don’t know, but I went with it.
With my eyeball as my guide
An inch and a half on either side
Some fishing line I never tied
Was wrapped and hidden deep inside
I’ll work on my poetry. Here’s the steps I took to wrap it without tying it.

Step 1:
Make a loop on the back of the bow.
Step 2:
Wrap the line around a few times. Once there’s enough to hold the bottom of the loop, you can begin to turn the bow with one hand and hold the string with the other hand . That way, you don’t have to wrap the line around.
It’s easier to turn the bow. Keep it tight and close together. Once you have most of the line wrapped, tugg on the loop a little to tighten it on the other end.
Step 3:
Cut the line from the spool, and stick the end of it through the loop. Then pull the string hanging out the other end so that the loop tightens around the line you just stuck through the loop.
Step 4:
Continue to pull the bottom string so that the loop goes under the wrap. Do not pull it all the way through, because that will cause everything to unravel.
I just pull it about half way through.
Step 5:
Cut off the loose ends and voila!
The next step was to cover it in epoxy. Don’t use that 2 minute or 5 minute or whatever epoxy. It dries too fast. I used some stuff that’s supposed to take more like two hours to dry, but I don’t remember. That way, I have more time to work. I used a piece of scrap wood to apply it. A popsicle stick would work just as well.
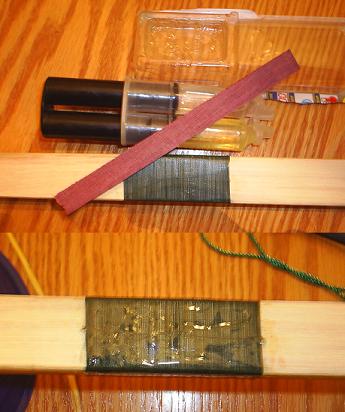
Now the only thing is to protect it from the cats until it dries. I put it where they can’t destroy it. I know it’s not the prettiest thing in the world, but don’t you worry.
I’m going to put a handle wrap on the bow when I’m finished, so you won’t even see what lies beneath.
I thought I was going to be able to start tillering today, but I don’t know what I was thinking. I want to let this dry overnight first.
Tillering
Oh boy, this is the fun part. I get to break out my super cool tillering device.
The truth is, I started floor tillering yesterday just to see how stiff it was, and something bad happened. I kept hearing “snap” “crackle” “pop.”
I hate that sound. I inspected the backing, the belly, and everything, but could not discover the source of the mischief. So I decided that today, I would thin down the belly a little. I used my belt sander to do that.
Just as before, I used facets to keep the D-shape. That weakened the bow a little, but I’d rather have a weak bow than a broken bow. Wouldn’t it be a shame if, after all we’ve been through, this bow broke? I shudder to think of it!
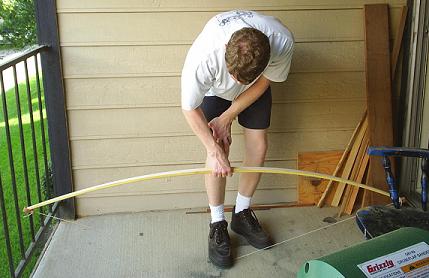
Here’s me floor tillering today.

Wahoo! No cracking sounds! But it still make me nervous that whatever it was, it will come back to haunt me.
And now I want to introduce you to my super cool tillering device. Here it is.

That there is a Grizzly pneumatic drum sander. It has a 1 HP motor, and it comes with two inflatable sanding drums and a flap sander (which I never use). These inflatable drums are great. They’re squeeable.

I just use a little handheld bike pump to inflate them, and my finger to deflate them. You can vary how squeezable they are by varying the air pressure.
This wonderful device is perfect for tillering. You never get those little bumps you get with a belt sander, and you can smooth out those facets on the ELB with no problem.
read.. red oak board bow build-along tutorial
It is almost impossible to get a hinge when tillering with this sander. I love love love love love it! It’s my favorite power tool.
Ever gotten a cramp in your shoulder from trying to sand a fiberglass bow? This drum sander is perfect for fiberglass bows.
You just put a finer grit sleeve on it (I use 120 grit), and you can sand it in seconds. It’s great for tillering a fiberglass bow, too.
Let me wipe the spit from my chin, and we can continue.
I decided to use my sanding drum to thin down the backing just a little. After that, I sand the back with grits 100, 120, 220, 400, and 1000, to get it smooth as an android’s butt. Imperfections are hotspots for splinters, and the last thing we want is a splinter.
After floor tillering, the next thing I do is put my bow stringer on it and excercise the limbs.
It seems like whenever I glue up a bow, it starts off being deceptively stiff. In my efforts to unstiffen it, I end up taking off too much wood, and the bow is too light.
To prevent such deception, I exercise the limbs like this. Without taking off any wood, it will loosen up a little. I do this about 50 or 100 times. It’s good exercise for the bow and me both.
The next step is to file temporary nocks. I’m not going to put the antler tips on until after it’s tillered.
That’s right! I’m using antler tips. I made the decision last night after looking at some pictures on the internet and doing some reading.
All I’ve got to do is figure out how I’m going to get my hands on a 1/2″ boring bit ground in the shape of a “V”. Surely I have a friend somewhere with a bench grinder. I wonder if I could use my dremel tool. That would probably take all day, though.
Back to our story. Here’s how I do the temporary nocks. First, I draw a line across the back one inch from the tip.
I use that to guide where I cut the nocks on both sides. This isn’t the usual way I cut nocks. There’s a much easier way.
You just start filing across the back of the bow and work your way around. That way, you’re ensured to have even nocks.
But I’m not doing it that way on this bow, because I don’t have tip overlays, and these are just temporary.
Anyway, I start my cut with a triangle file. Then I continue with a rattail file.

It’s easier to start with a triangle file, because then you don’t have the file slipping and sliding all over the place while you try frantically to hold it steady.
The triangle file makes a groove, and then the rattail file fits in it and doesn’t slide around.
The next step is to use a long string–one that is under no tension when used to string the bow. I have a flemish loop at one end and a timber hitch at the other end so I can adjust the length. Here I am giving it a pull.
What I actually do in situations like this is look at my reflection. You see, I have a sliding glass door on my balcony, and I just stand in front of it, pull the bow several times, and watch the limbs bend.
Ideally, I’d use a tillering tree, but since I live in an apartment, I can’t nail anything to the wall on my balcony.
Taking pictures helps, too, because then you can study your subject as long as you want without fear that you’re going to cause excessive set by having it bent for so long. It’s also easier to see imperfections with pictures.
The only problem is that it’s time consuming to take a picture, put it on your computer, then go back to the bow.
I can feel the bow bending in the handle when I pull it back, and that scares me, so for now, I’m going to stay away from the handle, about five inches on both sides, while tillering.
I’m also going to stay away from the tips about five inches, because when I get ready to put the antler tips on, I’m going to round out the tips, and that will require that I remove wood from them.
So I want to keep them stiff for now.
Each time I remove a little wood, I excercise the limbs at least 20 or 30 times, depending on how patient I am. The more the better.
I’m probably going to be extra careful with this bow and go slow, because I’ve invested too much time in this build along to have it break.
You have to keep track of which limb is the upper and which limb is the lower, because you don’t want to look at a picture, say “I need to work on the upper limb” and then go work on the lower limb.
Usually, the way I do this is to look for some kind of distinctive mark, defect, or peculiarity on one of the limbs and declare that limb to be the top or bottom limb. That way, even if I take the string off, I’ll always know.
August 16, 2005
Last night I read two discouraging things in The Traditional Bowyer’s Bible, Vol. 1. I read that Osage isn’t that great for English longbows, because it’s too dense and heavy which causes a lot of hand shock.
Yew is lighter and doesn’t cause as much hand shock. That, I wasn’t too worried about. But then I read that Osage that is lighter in colour is not as strong as Osage that is darker in colour. The Osage I’m using for this bow is lighter in colour than most Osage I’ve used.
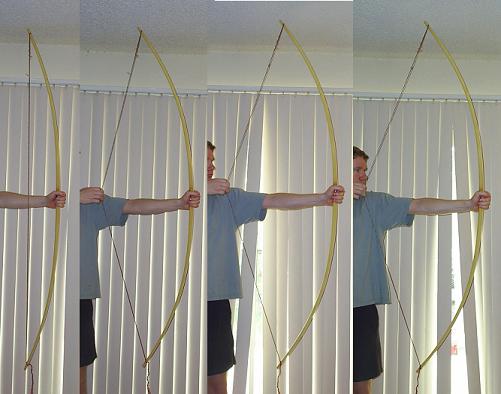
Anyway, this is the first bow I’ve made that bends in the handle, and it’s an eerie feeling to me, so I’ve been working on getting the outter limbs to bend more so the handle will bend less.
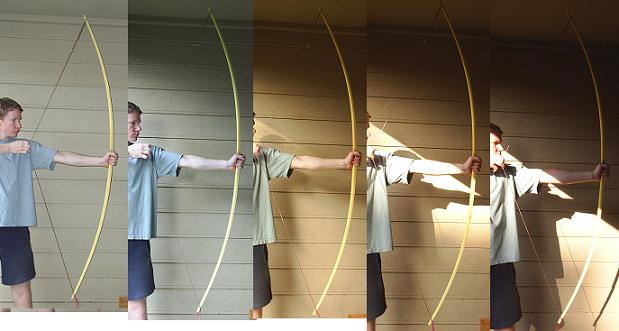
I don’t remember if I mentioned this or not, but I’m not shooting for any specific draw weight. As long as it’s at least 30#, I’ll be happy if it just survives to become an ELB.
Notice how the color changes in the pictures as you move from left to right. That’s because the sun is coming up.
It’s hard for me to tell the difference between these pictures, but I can definitely feel it when I pull the bow back. It bends less in the handle, and it’s weaker.
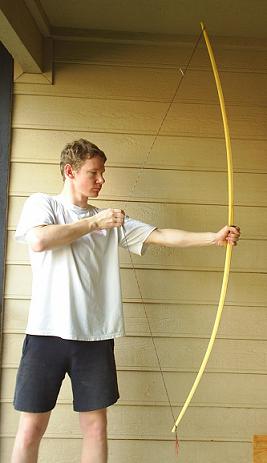
I’m going to go ahead and brace it.
Here it is braced just a couple of inches, and me tugging on it a little.
It feels like it’s bending in the handle more than it looks like it’s bending in the handle. The lighting was getting so bad, I think had to bring my picture studio indoors.
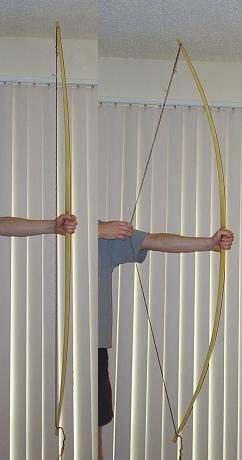
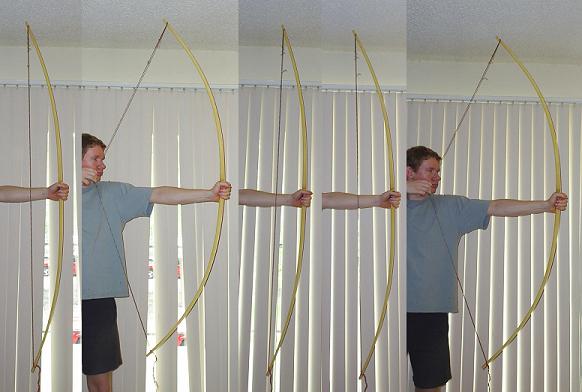
After exercising it some more, I braced it higher.
It seemed to me that the bottom limb needed to start bending closer to the handle, but as I worked on it, the brace profile shifted to where the bottom limb was weaker than the top limb.

Once I got the bottom limb bending like I wanted, I weakened the top limb to make things more even. In the process, I finally got the bow to full draw.
Here’s a look at it unstrung.
In the end, it came out at 41 or 42 lbs at 28″. It may lose a little when I sand it down. I’m tempted to take the fishing line off the handle area and glue on some wood both on the back and the belly.
I’d feel better about the handle then because it would be a little stiffer. That would probably also bring the bow weight up a little. Right now I’m so sleepy I can hardly think.
Some Post-Tillering Reflexions
Tillering is the most important part of making a bow, so I think some reflexion is in order. This was my first attempt at making an adult-sized bow that bends in the handle, and I learned something in the process.
I learned that the final draw weight of the bow is predetermined by the initial thickness of the handle. The whole time I was tillering that bow, I was concerned about the handle.
It felt weird to have it bending in my hand, and I was afraid it was going to break. I kept removing wood from the limbs to take some of the strain off the handle until the whole thing seemed to be well-tillered with the flex distributed evenly along the whole length of the bow.
If my handle had been thicker, and therefore more stiff, I would not have had to take as much wood off the limbs in order to take the stress off the handle.
A bow is most likely to break during tillering, but once tillering is done, you aren’t necessarily in the clear.
It still needs to be shot several times, and that’s what I’m going to do when I get off work in the morning.
Okay, well, I shot it some last night in the apartment, but not from full draw. I’ll let you know how it goes.
later…
I shot the bow about thirty times this morning. It does have some hand shock, as I expected it would since it bends in the handle. It also seems a little slower than other bows I’ve shot.
Other than that, I like it. I dare say it seemed as quiet if not more quiet than a bamboo bow, which surprised me. I was amazed at how accurately I can shoot with it.
It did seem to shoot a little left of where I aimed, but it least it was consistent. I suppose with some arrows a little less stiff, I could shoot better with it. There’s no arrow rest, and you can see the result.
The truth is, I’m really starting to like this bow. I think I’ll take it to Scarborough Faire with me next year.
The next step is to put on the antler tips. It may be a while before I do that, because I’m still trying to figure out how I’m going to attach them.
I’m going to hit the pawn shops this morning and see if I can find a 1/2″ flat bit. Maybe I’ll get lucky and find a cheap bench grinder, too.
You know what I’d like to know? I’d like to know how the English did it in the medieval times. I’ve read several sources now, and it seems like everybody does it by grinding a flat bit into a V shape and then using it to drill a hole in the horn or antler.
But I know good and well that medieval English did not have power drills, flat boring bits, and bench grinders. How did they do it?
Puttin’ on the Antler Tips
Yesterday, I went pawn shopping. After going to three pawn shops without finding a flat 1/2″ drill bit, I came to the realization that I was probably spending more money in gas than if I had just gone to Home Depot and bought a new one.
So I went to Big Lots and got one for 89 cents. When I got home, I emailed everybody in my Bible study group to see if anybody had access to a bench grinder.
I got two positive responses, so this morning I posted a message on The Leatherwall to solicit advice about grinding this drill bit, since I’ve never used a bench grinder before.
One guy on there suggested I use a cone-shaped rotary rasp. Well, I had never heard of a cone-shaped rotary rasp before, but when I saw one, my eyes lit up.
I figured the drill bit would work better, but impatient as I was I went to Home Depot and got a rotary rasp instead for about $3. I came home, practiced on some wood, and then set to work.
Here are the antlers I used.
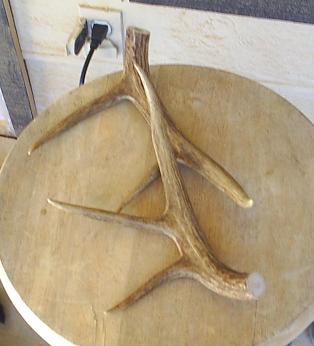
To get the base wide enough for the limb tips, I had to make the antlers kind of long. I cut off those end pieces and got a hair over half an inch.
Here are the antlers and my instruments of torture.

The top doohicky is my rotary rasp. It’s a little dirty, because I practiced on some wood. At the bottom is a 1/4″ forstner bit.
I didn’t have an ordinary 1/4″ bit. The reason I used it is because the end of the rotary rasp is blunt, and about 1/4″ wide. I used the 1/4″ drill bit to drill a hole through the antler. Then I used the rotary rasp to, you know, V it out.
The hardest part was drilling straight through the middle. I didn’t do a perfect job. The truth is, before using the 1/4″ bit, I drilled a tiny hole with my dremel tool.
I figured it would be easier that way, I’d have more control, and I could drill a hole straight in. I didn’t do a perfect job, but it’ll work.

I kept measuring the diameter of the holes until I got to about 1/2″.
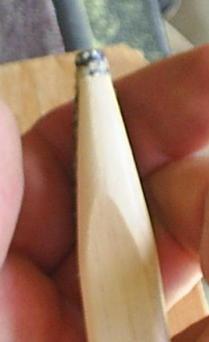
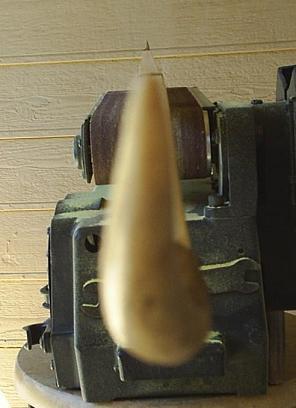
The next step was to shape the limb tips to fit in the holes. That part was easier than I thought it would be. I just sort of rolled the tips on the belt sander, and they rounded nicely.
I kept doing it until the temporary nocks disappeared. To make sure I got the taper angle right, I would check by putting the rotary rasp behind the tip so I could just see the edges of it.
I had to flatten the tips since the bottom of the holes in the antlers were flat, but I only did it enough to make the antler fit snugly. Once they fit snuggly, I’d look at where the tip was sticking in the antler and see gaps.
I fine-tuned it with a file by filing where there were no gaps. That caused the gaps to close until finally I came really close to an almost perfect fit.
To glue them on, I used the same epoxy I used with the fishing line on the handle. I mixed some up, and then filled the hole of one antler with it.
When I stuck it on the tip, epoxy oozed out all over. I rotated the bow to let it get all the way around. It dripped a little, and I wiped enough off just to keep it from dripping. Then I did the other one.
Once I had them both on, I lined them up and pushed them tight. I wish there was a way to keep some pressure on them, but I couldn’t figure anything out.
It put it where the cats can’t get to it. I’ll let that sit over night before working on them anymore.
August 19, 2005
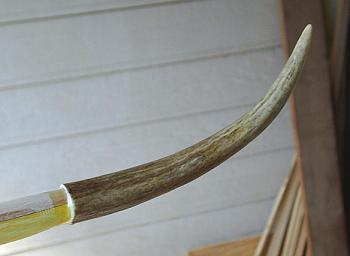
Today, I shaped the tips a little. I probably didn’t do a good job of it. Where the antler meets the wood ain’t so pretty. I think I’m going to put some kind of wrapping around it to pretty it up. Here’s a look-see.
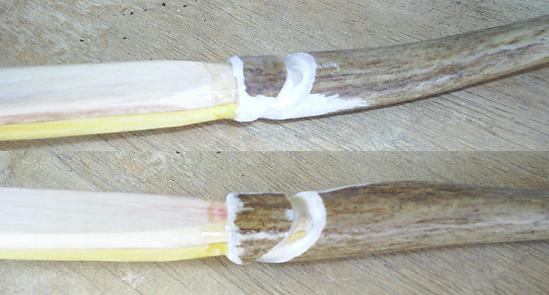
Notice how I exposed some of the wood as I filed the nocks. I don’t think that will be a problem. I seem to have gotten a good fit, there are no gaps, and hickory and osage are pretty strong anyway.
After filing the nocks, I decided to string it and check the tiller. The bottom limb seemed to be bending more than the top limb, so I turned it over.
That’s the cool thing about bows without arrow rests–you can turn them over.
Doing the handle
After sanding the bow with 120, 220, 400, and 1000 grits, I put three coats of Deft on it. Then I wrote my name, length, draw weight, and stuff.
Then I put a fourth coat of Deft. The next part was the handle.
I decided at the last minute that I should put some thick leather on the handle to sort of round it out a little more and make it more comfortable.
I glued (using Titebond II) one narrow piece on the belly, and two on the back, stacked on top of each other. I figured that might also protect the back from blowing apart, too. Here’s the back.

See how I have the one on top smaller than the one on bottom? That helps round things up. Before I glued them on, I also sanded the edges down with the belt sander.
I didn’t turn it on; I just rubbed them against the sanding belt. That gave them a bit of taper so they smoothed into the bow a little more.
I figured I didn’t need to be pretty with it since I’m going to put a handle wrap over it anyway.
I also put suede strike plates on there with Barge cement. I glued them close enough in so that the handle wrap will wrap around the bottom of them.
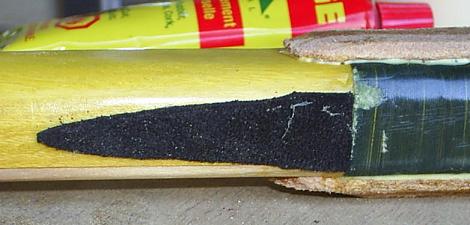
Last night, I was reading in The Bent Stick by Paul Comstock that a bow really has to be shot in a lot before it arrives at its final tiller.
Being indecisive about which limb would be the top, I decided to make it to where I could shoot it either way. I put strike plates on both sides.

Don’t know how traditional that is, but it’s got to be practical!
August 20, 2005
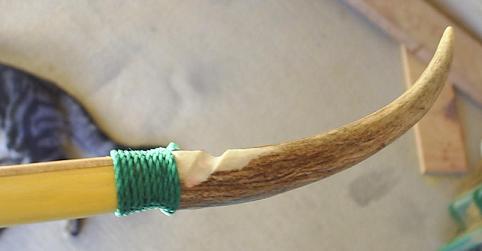
This morning I wraped green twin around the handle to finish it off. I used the same method I used to put the finishing line on with, except that I used no glue.

The cool thing about this handle wrap is that it looks cool, it costs almost nothing, and it’s easily replaced. I can just take it off and do another string wrapping if it gets dirty or I just want another colour.
I also put wraps around my tips for aesthetic reasons. I could probably come up with something a little better sometime, but this is better than nothing at all.
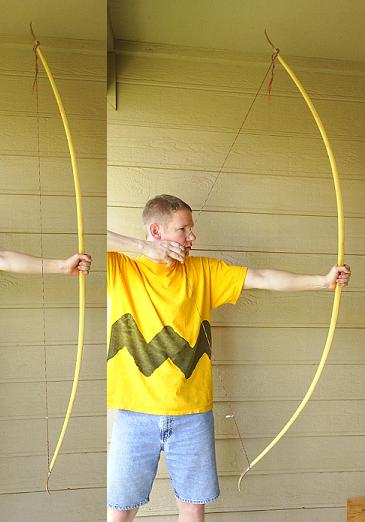
And that’s it. Here’s the final product.

Thank you for joining me on this grand adventure. Now I must go make another one…
Later…
Oh yeah, I forgot to mention. The total length of the bow, antlers tips and all, is 80″. It’s 73″ nock to nock. It came out to 41# at 28″.
Disclaimer: Sam Harper owns the rights to this article’s images and written content.