
Making a successful shot with your bow is a multi-step process. Failure to execute any one of these steps in their entirety can lead to poor form and shot execution. Of these steps, one of the most vital is that of efficiently drawing your bow. If you are unable to successfully draw your bow in a manner that is conducive to proper form, accuracy will suffer.
In the event that you are new to archery, one of the primary quandaries that you are faced with is that of how to draw a compound bow. If this reflects your current situation, you are not alone, as every archer has questioned this same principle at one point in time or another.
Contents (Jump to Topic)
ToggleLuckily, the process of drawing a compound bow is far easier than one might think when the proper steps are followed.
Draw Length
Before you can ever hope to master the task of drawing your compound bow, its specifications must be adjusted to meet your personal needs. One such specification that will require attention is your bow’s draw length.
Your draw length is the distance at which your bow’s string can be pulled back before the bow’s cams actuate and your rearward pull ceases.
This distance is adjustable on virtually all modern compound bows, and an archer should be measured by a qualified individual to find their proper draw length.
If a bow is not adjusted to your specific draw weight, shooting form can be adversely affected.
This is due to the fact of being unable to anchor properly or to comfortably hold the bow at full draw while maintaining correct upper body geometry.
read.. axle-to-axle length and why its important
Draw Weight
Another specification that must be optimally set to successfully draw your bow is its draw weight.
While too light of draw weight is seldom an issue for archers unless in a hunting scenario, an overly heavy draw weight can make it extremely difficult, if not impossible, to draw your bow with any level of success.
Your draw weight is the exact poundage of force that must be exerted on the bowstring to pull it rearward into the fully drawn position.
This can be easily adjusted by turning a bow’s limb bolts and is completed with the use of a scale and Allen wrenches.
Many bows on the market today feature versatile draw weight settings that can differ substantially based upon the given adjustment.
A draw weight that is too heavy will cause an archer to struggle when drawing his or her bow. This, in turn, leads many to drift upward with their bow hand or pull violently on their bowstring in an attempt to reach full draw.
This not only presents difficulty in maintaining proper form but can lead to physical injury as well.
Steps To Drawing A Compound Bow
As previously mentioned, successfully drawing a bow is a multi-step process. By following these steps, you will find drawing a bow to be of little difficulty, and will be better able to build correct shooting habits, while also minimizing any potential safety hazards.
Nock Arrow and Connect Release
Before drawing your bow, you will need to nock an arrow and connect your release to the string’s D-loop. Ensure that your arrow is correctly cradled in its rest before proceeding.
Line Body Up With Target
You will now consider where it is that you will be aiming, and adjust the angle of your body accordingly. Turn your body in a manner that lines your downrange facing hip up with the target, while your other hip faces in the opposite direction.
Set Your Stance
While not all archers place their feet in the exact same manner, the most common stance is that of having your feet spread shoulder-width apart. You can modify this stance for comfort after you have familiarized yourself with basic form.
Raise Bow Arm To Target Level
You will now raise your arm that is responsible for holding your bow, and align it in an angle that is directed outward. The level at which this arm is held should be approximately nose high.
Slightly Raise Opposite Arm
Before pulling rearward on the bowstring, raise your non-bow arm slightly upward. You want the elbow of your arm on which you release is secured to face out and behind you, as opposed to at a sharp downward angle.
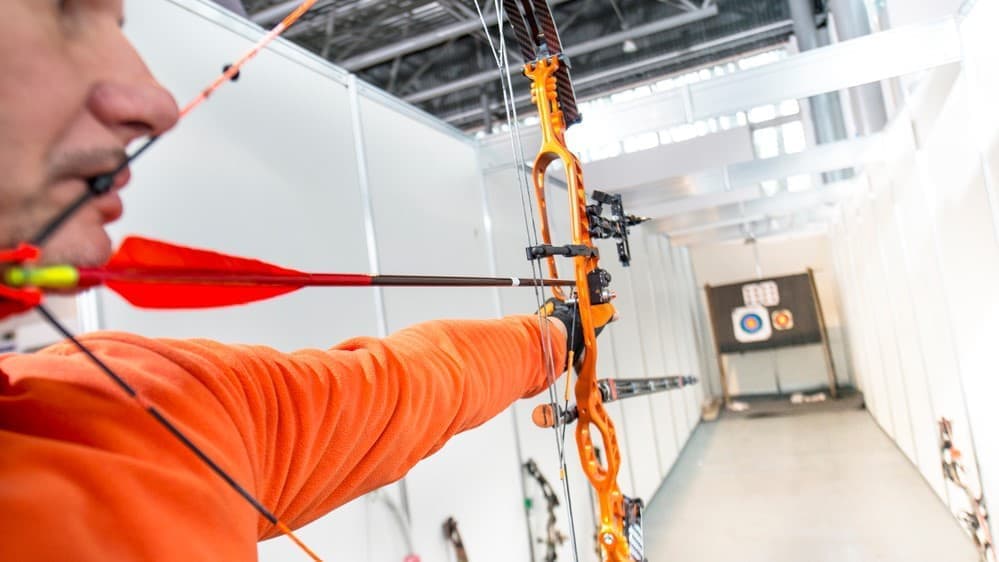
Draw Rearward
While keeping your bow arm extended, pull your bowstring rearward in a smooth and concise manner. The elbow on your non-bow arm should rise slightly before gradually settling to a more even level upon reaching full draw.
Your torso will also rotate into a more natural position as you draw. It is important to always keep your fingers free of your release’s trigger while drawing your bow, as this prevents accidental discharge.
Anchor Your Non-Bow Arm
Upon reaching full draw, you will anchor the hand on which your release is attached. The majority of archers choose to place their hand along their cheek, with their head turned to face the target.
Check Upper Body Geometry
You will also check the geometry of your upper body. Your body and both arms should form a “T” shape, with each arm forming a 90-degree angle to your body. If you must aim downward, any bending should take place at the waist.
Check For Bow Arm String Clearance
Before releasing your shot, it is crucial to ensure that your bow arm is out of the way of the bowstring when it is released. Some archers lock their elbow, while others leave it bent slightly.
Either method is satisfactory in regards to form. However, much of your decision on which method to exercise will come down to the issue of clearance.
Check out this video for more on how to draw your bow.
Drawing Your Bow Made Easy
While drawing a bow might at first seem intimidating to anyone who has never completed such a task, there is nothing worrisome about the process.
You must first ensure that both your bow’s draw weight and draw length are specifically set to meet your needs. Then, a mental rundown of a few simple steps is all that is needed to find success.
Please feel free to leave any comment you might have, as we always appreciate feedback from our readers.