
Special Thanks to Sam Harper for allowing us to republish his tutorials and build along instructions. His expertise and knowledge in the bow-making field have greatly benefited many readers, and we are grateful for his generous permission.
I’ve been putting this one off for a while because it’s a big of a “project” if you know what I mean.
The reason I’m doing this is because unlike self-bows and things like that, there aren’t a whole lot of comprehensive fiberglass build-alongs.
There are a few that amount to, “cut the wood,” “glue it up,” “yada yada yada,” and “you have a bow.”
Mine will be a bit more detailed than that, but mind ye, it’ll be a little less professional as well. I live in an apartment and get by with the bare necessities.
When I make a fiberglass bow, I actually have several things going at once. I glue up my risers and spliced lams at the same time while preparing my fiberglass.
That makes it hard to do a chronological build-along. Some of this build along, then, will be more topical than chronological.
This build-along also won’t be quite as idiot-proof as the other build-alongs, because I just can’t muster the enthusiasm to cover the same stuff over again.
You might want to have a look-see at the ipe build-along or the red oak build-along to fill in any gaps.
The first topic shall be the form.
Three Kinds of Forms
There are basically three different kinds of forms you could use to glue your bow up on. One utilizes the firehose method, one the rubber band method, and one the c-clamp method. Of course there’s also the combination rubber band and c-clamp method.
The firehose method, I think, is probably the superior method for getting good even pressure all over the bow.
It’s also much quicker to glue a bow up with that method. I have two problems with the firehose method, though. First, it’s more difficult to make the form.
Unlike the c-clamp and rubber band forms, the firehose form requires two pieces–a top and a bottom–that fit together, and the bow goes between them.
If you’re gluing up a riser, too, then you have to really cut that thing pretty accurately to accomodate the riser, and every riser you stick in there has to be identical. With the other two methods, you only have to have the bottom part of the form, and you have a lot more flexibility to try different kinds and sizes of risers.
Second, it requires an air compressor to inflate the firehose unless you want to spend a lot of time pumping it up with a bike pump. I don’t have an air compressor, I don’t have room for one, and I can’t afford one.
The rubber band method does a good job of putting even pressure all over the limbs. It’s also dirt cheap.
You just go to a bike shop and say, “Do you have any inner tubes you’re throwing away?” They’ll give you a few, and then you can just cut them into rubber bands.
Once you have a bow glued up, the form is also very light (lacking any c-clamps or twice as much form), so it’s easy to manuever through your crowded apartment to your hot box carrying the form.
There are two problems I have with the rubber band method, though. First, even if you wrap saran wrap around the bow loosely, if you cover the bow in rubber bands, there’s nowhere for the glue to expand when it gets squeezed out.
It will pop through the plastic and glue your bow to the form. Second, I still haven’t figured out how people use the rubber band method exclusively on the riser.
If I were going to use the rubber band method, I would use it in combination with c-clamps. The rubber bands would go on the limbs, and the c-clamps would go on the riser.
I’m not going to go into the previous two forms. I use the c-clamp method for all my fiberglass bows. Now I’ll tell you how I made my form.
Making My C-Clamp Form
For me, this was the most difficult part of making a fiberglass bow. The good and proper way to do it is get your shape (a difficulty in itself), tracing the shape onto a thin piece of plywood, cutting it out with a band saw, then using a drum sander to perfect it.
Then glue two or more pieces of plywood together to get at least 1.5 inches thick and trace your form onto that. Then you cut that out with a band saw, leaving plenty of room outside the line.
Then you place the thinner piece of plywood you perfected earlier on it so that it sits a little under the area you just cut with the bandsaw, and clamp them together.
Then you use the thin piece as a guide for your router, and you use the router to bring the thicker piece (your form) to perfection. That gives you a perfect surface that is also nice and squared.
I am both lazy, cheap, and without a router, so I chose a different method. First, let me tell you how I got the shape.
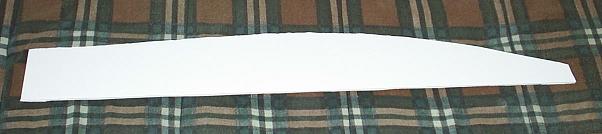
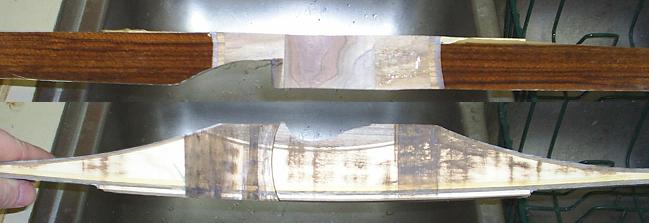
I got this CD tower at Bed Bath & Beyond that seemed to have a nice curve to it, and I used that shape to make my form. Here’s a picture of the form, my first bow from it, and the CD tower.

To get the form from the CD tower, I got some poster board and layed the tower on it. Then I traced the tower.
Then I cut it out with a box cutter. An exacto knife, pocket knife, or even a pair of scissors would’ve also worked. Then I used my belt sander to sand to the line and get it perfect.
Then, I went to a construction site and liberated a 2×6 which had been thrown away. I must warn you that a lot of people warn against using a 2×6 for a bow form.
The reason is because they warp, and if your form is warped, your bow will be misaligned or twisted. I believe it, too, because I’ve had pine warp on me after the first time being in the hot box. I guess I got lucky with this piece of wood, though. I’ve made something like eight bows from it, and it has yet to warp.
Anyway, I cut the 2×6 down to 6 ft, found the center, and drew a line. Then I placed the poster board template on half the board and traced it. You can vary the amount of reflex or deflex by varying the angle at which you put the poster board on there.
Just measure marks on both ends of the 2×6 so you can put the poster board at the same place on both ends and not have one with more reflex than the other. Trace one side, then trace the other.
Once that’s done, I cut it out with a band saw. This would be incredibly difficult with my dinky little 9″ band saw, so I went to a friend’s house and used his 12″ band saw. Since the wood is six feet long, it helps to have a friend who can hold one end while you guide the other. Go slowly so you can get a good accurate cut.
After you’ve cut it out, sand to the line with a belt sander. It would probably be a lot easier if you had a drum sander or spindle sander at 90 degrees from a table.
I had to hold it free hand on a belt sander, but I was able to do a decent job.
This is another advantage of a 2×6. It’s softer and cuts easier than plywood, and it sands easier.
Next, I drilled holes in the form for the c-clamps. I use 3″ clamps for the limbs, 4″ clamps for the fades, and a 6″ clamp for the middle.

The holes for the 3″ clamps are 1.5″ diameter. The one for the 6″ clamp had to be bigger to fit the clamp. The holes are a little less than 4″ apart when measure center to center.
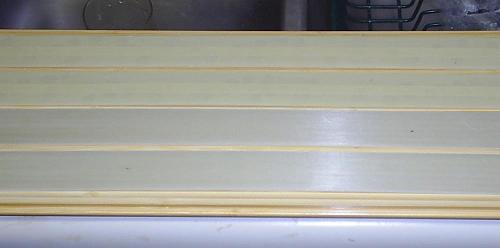
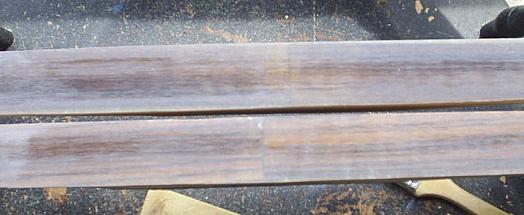
Next, to get rid of the imperfections, I glued on a thin slice of ash. A lot of people use formica for this, but I think formica is too thin to really correct my kind of errors.
The thicker the lamination you glue on there, the better it will correct your errors. I used my lam grinder to grind a good even piece of ash six feet long and glued that on there.
Once the ash is good and glued, I marked the center, and then measured out 8″ on each side, made a mark, and labled it 16″. That’s because I figured 16″ was a good length for a riser. I later discovered the 18″ riser.
I measured 1″ from the 16″ mark on both sides and labled that 18″. (You see, one inch on two sides equals two inches, so one inch left of 16″ on one side plus one inch right of 16″ on the other side amounts to 18″.)

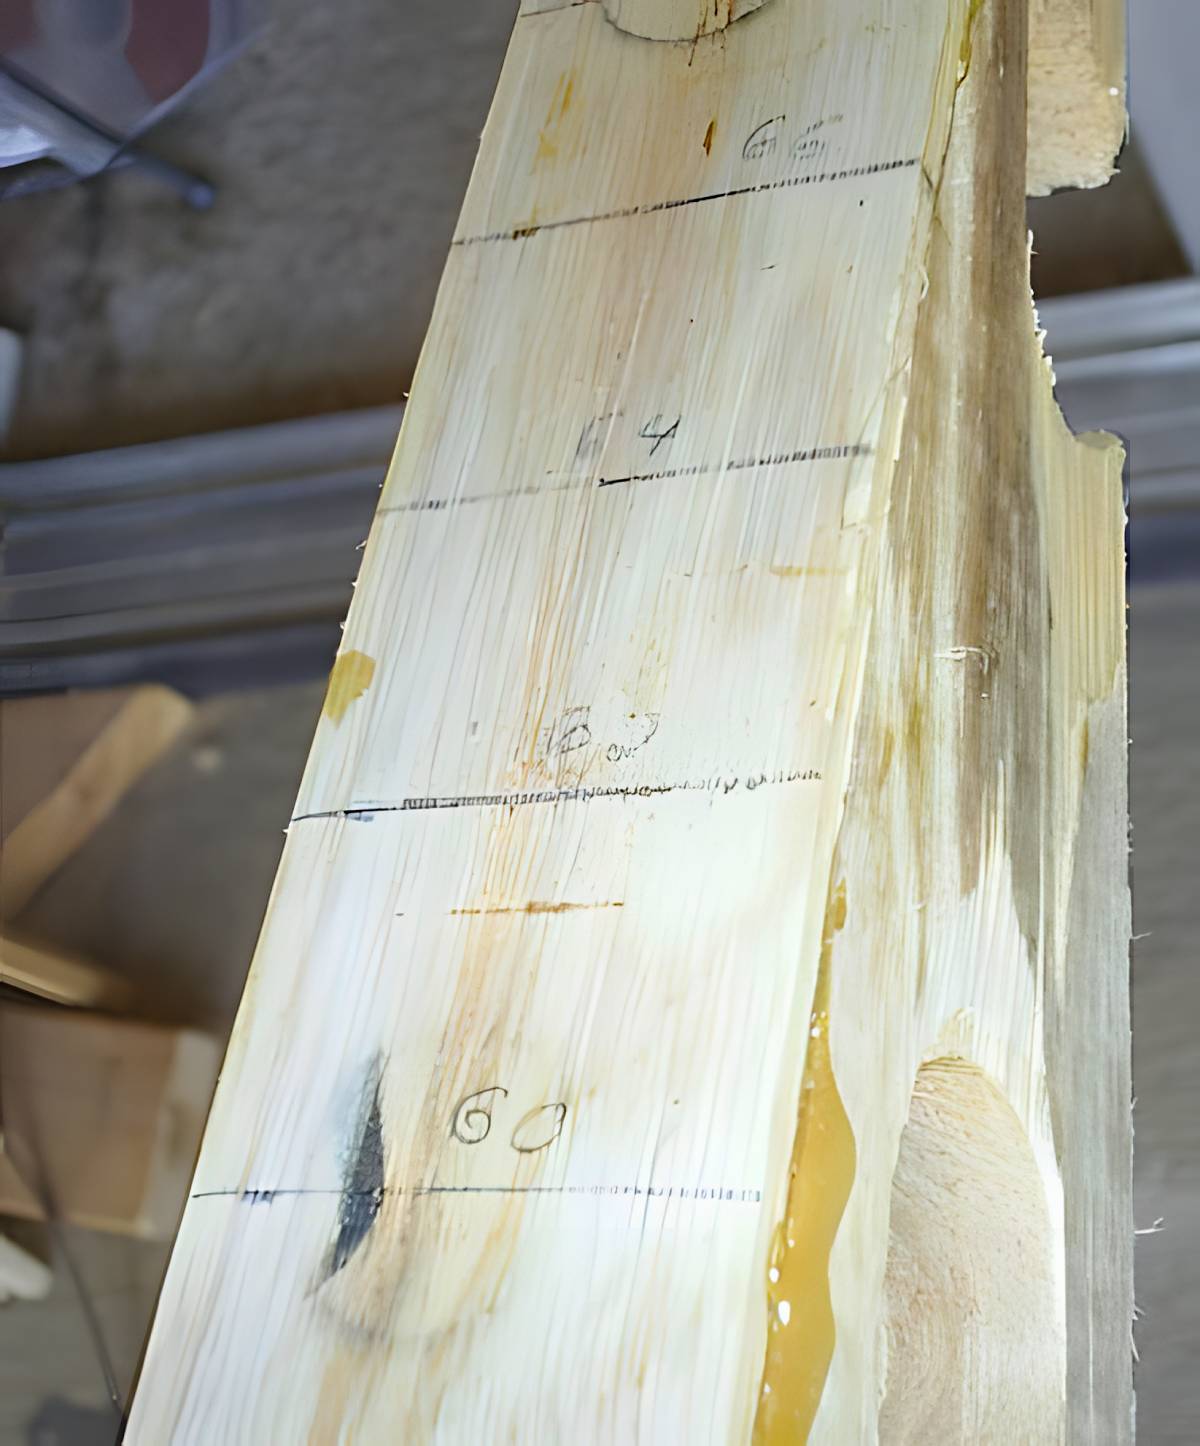
Those marks aren’t really necessary, as I later discovered. The next marks are, though. Next, I wanted to make some marks near the end of the bow according to the length of the bow I wanted to make.
I measure 30″ on either side of center and labled that 60″. If I wanted to make a bow that was 60″ nock to nock, I would not cut the bow at the 60″ mark. I would cut it at the 62″ mark.
That would give me an inch on either side from which to cut the nocks. I measured one inch intervals beyond 60″ to get 62″, 64″, 66″, and 68″.

The only thing left on the form was to glue and screw a piece of plywood on the bottom so it wouldn’t fall over.
There are many other ways to get the shape for your form. You could use an AutoCAD software program, draw it freehand (I did that once and it resulted in a fiberglass character bow.
But some people are successful at it), bend pieces of aluminum and trace them, borrow somebody else’s profile, trace a bow you already have, etc. Use your imagination.
As I said before, I did the limbs and riser at the same time, so rather than do a chronological build along, I’ll do a topical build along at this point. Let’s do the riser first.
Making a Riser
A riser can be as simple as a block of wood cut to shape. I thought I’d kill a few stones with this build along, though, and show how a riser might be jazzed up with a curved accent and contrasting woods. This is totally optional.
The riser needs to be at least 1.5″ wide. The length can be anywhere from 16″ to 20″, though for mine, I think 20″ might be a bit much, and 16″ is definitely too little.
18″ is good, but back in December I made a pretty sweet bow with a 19″ riser. That’s what I’ll do this time, too. Besides, when doing the fades, a 19″ block of wood might end up 18″ in the end anyway.
The riser should be at least 1.5″ tall. That all depends on how much contour you want in the grip. The more contour you want, the taller it has to be. I’m making mine a little taller than 1.5″.
Now suppose, like me, you can’t find any wood that is 1.5″ thick. For some reason your local hardwood retailer only sells it 3/4″ or 1″ thick.
Well, that’s fixable. You can just take two 3/4″ thick boards, 19″ long, and glue them together. As long as you don’t cut your arrow rest all the way to the center, nobody will ever know.
For this build along, I’m going to do a maple and walnut riser. First, I take two 3/4″ thick slabs of maple, 19″ long and 1.75″ wide…

…(sorry about the blurry picture) and glue them together with Titebond II.

I let that sit over night. Then comes the fun part–cutting the curve. I use a jig to get my pieces to match up perfectly. The jig consists of a piece of plywood that sits on the band saw table.
There’s a groove cut in it to accomodate the blade. Well lemme just show you the picture, and then I’ll explain it.

You see the groove on the left? That’s so the blade can fit through. The board is clamped to the table with the clamps upside down so they don’t interfere with the wood you’re about to cut.
On top of that piece of plywood is another smaller piece of plywood. See those holes drilled in it? Those holes go through both pieces of plywood.
Well, actually, they don’t go all the way through the bottom one. I use the different holes to get curves with different radii. I prefer the one that’s the farthest out where I have that peg. That peg is there to create a pivot.
The whole piece of plywood pivots on that peg. The peg has to be nice and snug so there’s no play in order to get the exact same curve in each piece of wood you cut. My holes and peg are 3/8″.
Sitting closer to the blade is a block of wood I have glued and screwed on there, and sitting on top of that block of wood is a toggle clamp.
They sell these on ebay, but I got mine at a local machinery shop. That toggle clamp holds the piece of wood while you swing the arm with the wood through the band saw blade.

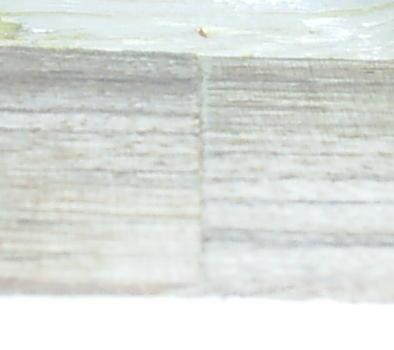
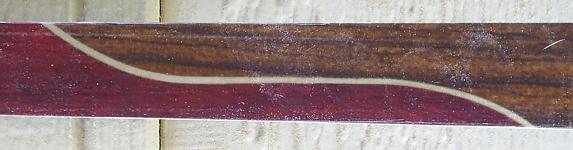
Pretty nifty, huh? After cutting the curve out of the maple, I also cut one out of a piece of walnut. See how nicely they fit together?

They fit even more nicely with some accent strips, because those accent strips will take care of the kerf left by the band saw blade. Other than that, there’s no point in putting an accent strip unless you can create a little contrast.
Sometimes, it’s hard to get contrast if you’re using a light and dark wood because the accent will either fail to contrast with one or with the other. To guarantee that I’ll always have some contrast, I just use the same woods. Since I’m using maple and walnut in the riser, I use maple and walnut accents, only switched.
I might as well tell you that I’m actually making two fiberglass bows at the same time. The other one uses a solid piece of Osage and some blood wood.
For the maple/walnut bow, I cut four strips–two thin pieces of maple, and two thin pieces of walnut. One maple and one walnut strip is used as an accent, and the remaining two are going to be overlays on the back of the handle.

With all the scraps left over, I can assemble them into handles for my bamboo backed bows.

There’s a way to also make a jig to use on a spindle sander that basically does the same thing. The last thing you want to do is ruin a perfect match by improperly sanding them. So I’m careful when I sand with my belt sander.
I don’t completely remove the tool marks. I use them as a guide to know how far to sand. I sand slowly and lightly. I do sand the accent pieces pretty well, though.
Here’s a dry run at how the glue-up will look.

I apply Smooth On to all surfaces, wrap it all in saran wrap, clamp it (making sure the saran wrap doesn’t get caught in the gaps), and stick it in the hotbox for six hours. It seems a waste of electricity to use the hotbox for just one handle. That’s why I glue up both risers and my limb laminations at the same time.
After that’s done, I cut it out. You want the bottom of the handle to perfectly match the shape of the form, but you have some flexibility with the fades just so long as you have the last inch or two really thin.
The more your fades are dished, the harder it will be to put those 4″ clamps on there, because the stems will hit each other. That’s why mine aren’t all that dished.
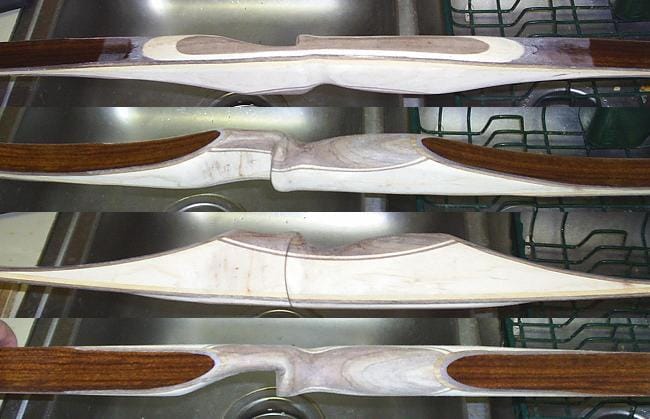
One way to get the shape of the bottom is to hold the riser against the form and trace it.

See how I’ve got a center line drawn on both the form and the riser? That’s important.
I did a few different risers until I got a shape I really liked on the fades, and I made a template out of poster board.

That’s another way to do it. Of course your cats may eat the tips off.
Cut that out with a bandsaw, remembering to cut outside the lines. Then sand to the lines with the belt sander. Once you’ve done that, you want to make sure the riser fits on the form. Just set it on the form, lining the lines up, and have a look-see.

Now just sand where it touches and don’t sand where it doesn’t touch. Eventually, the whole thing will touch, and that’s when you stop sanding.

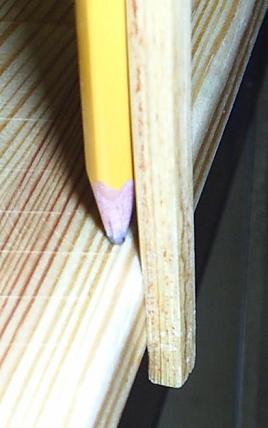
Go slowly as you get closer and take your time. Just sand, check, sand check. It’s all trial and error. Once you have the riser fitted to the form, then you can start sanding the fades. Be sure to get those tips nice and thin.

Look! You can even see light through mine.

Now put that somewhere safe so nobody breaks those tips off.
Making Limb Laminations
This could be as easy as taking a stick of wood 36″ long, 3/4″ thick, and 1.5″ wide, cutting laminations out of it, and grinding them.
But to kill three stones with one bird and prevent me from having to do a separate build along, I’m going to show you how you can jazz up your limbs a little.
I’m going to do spliced limbs. This is my second time doing spliced limbs, but it’s my first time doing interesting spliced limbs. The first time, I simply cut the splices at a 45 degree angle. This time, I cut some curves.
read.. how to make a cheap and easy hotbox
I’m using zebra wood and blood wood for my laminations. I’ll use a bamboo core, but lemme talk about the cool stuff first.
I take a stick of bloodwood and a stick of zebrawood, both of the above dimensions. I put a few small spots of Titebond II on there to glue them together.

A little dab’ll do ya. This is just so you can cut them together without worrying about them sliding apart and ruining your perfect cut. You want to be able to simply pry them apart after you cut them, so not too much glue. Clamp them together.

Let that sit over night. The purpose of cutting them together is soes you can get a perfect fit no matter how erradically you cut them with the band saw.
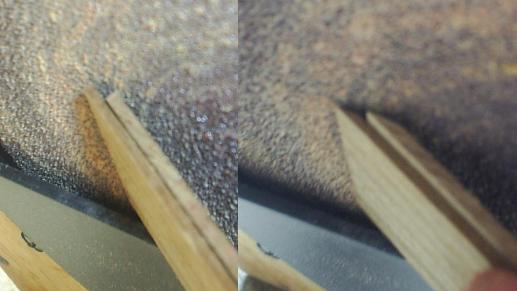
Now decide where you want your splice to be–in the middle, near the tips, near the riser, etc. I’m doing mine closer to the tips. Scribe a line along the center of the lamination.

See that line? I know it’s hard to see because of the glare, but it’s there if you should care to sit and stare. This line is just a guide. I’m going to cut a curve to the line, follow the line down a bit, then curve back out the other side of the wood.

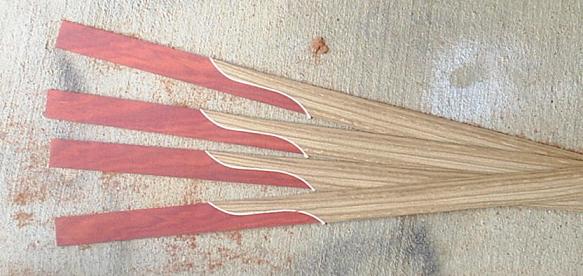
And there we go. Now I can just pop them apart since I didn’t use but a dab of Titebond II, and switch the pieces.

Now I can make two sets of lams instead of just one. It’s important if you’re doing curved spliced to use an accent strip of wood to account for the kerf of the band saw.
Otherwise, your wood will be misaligned, which is not a problem if your wood is wider than 1.5 inches. If you’re just doing a 45 degree (or whatever) straight line splice, you don’t need an accent.
I’m going to use a thin piece of maple for an accent. Here’s a look at the dry-run.

If you’re doing a 45 degree (or whatever) splice, it’s very important that you have something holding the ends of the wood. Otherwise, when you apply a clamp to the joint, the wood will slide apart.
What I do is glue everything up on another straight stick of wood to keep everything aligned, and I clamp a piece of wood to each end so that the wood to be glued fits between them and is prevented from sliding apart.

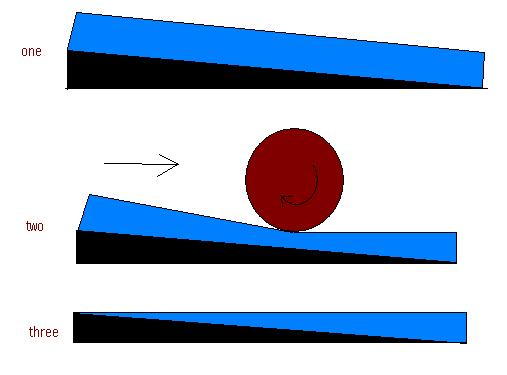
I’m doing that for my splices, too. I was just thinking, though, that there’s a way to cut your splices so that you don’t have to worry about them sliding apart when you clamp them together. Instead of cutting a curve to a straight line and to a curve, you could do an S-shape.

Do you see how with this design the limbs wouldn’t slide apart when you clamped them together?
Anyway, when I glue this up, I put wax paper around it so I don’t glue it to that board. I also put a piece of wood on top and a clamp on that to make sure both pieces of wood are aligned.
I didn’t take a picture of that, though, so you’ll just have to visualize.
I glue this up with Smooth On and stick it in the hotbox for six hours. After that, I cut the laminations out on the band saw.
But first, I break off those pieces of maple and sand those edges so it’ll slide smoothly along the band saw table. I also sand just a little on the glue joint just to remove any glue that’s sticking out so it will slide along the rip fence.
I’ve got a friend who could probably get six laminations out of this, but I with my feeble skills do well to get four, which is what I want. I want the two outter pieces to be slightly wider, though, since there’s that glue that got squeezed out the sides and possible misalignment.
I want to leave a larger margin of error on the outside two laminations. So I just cut the thing down the middle. Then I put the inside cut against the rip fence and cut them both again, giving me four laminations.
They’re pretty thick, too. That’s okay. It’s better to be too thick than too thin. That gives me lots of room to grind them enough to get the tool marks out and everything.
The next step is to grind them, but before you grind them, you need a lam grinder, don’t you?
But you’re a poor bloke who lives in an apartment and can’t afford to buy a Performax thickness sander, and you lack the skill to build a really cool lam grinder or the money just for a motor and bearings. Whatcha gonna do?
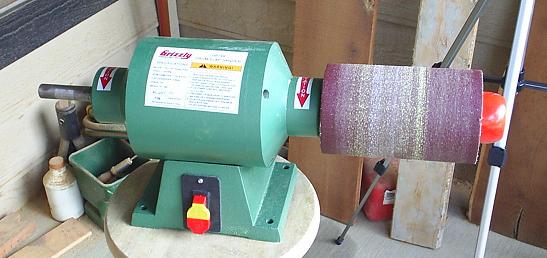
That’s easy enough. You can make a lam grinder out of a belt sander. I probably would not be making fiberglass bows if Cambo from The Leatherwall had not shown me this. Mine is a bit more crude than his because I have a serious lack of wood-working skills. I’ll show you some pictures, though, so you can figure out how it’s made and do a better job than me.
Here it is all rarin’ to go.

It’s just a box I set my belt sander in. The table goes between the body and the sanding arm. I have the sanding arm raised at an angle.
You can’t see it, but there’s a block of wood sitting under the back of the belt sander. I use that to square everything up when I put it in the box. Now let’s look at some different angles. There’s a hinge in the back for the table.

An improvement would be to put two small hinges on there sort of skewed. That would elminated any play.
At the other end, there’s an eyebolt that raises and lowers the table.

Look closely at this picture. There’s a little nut glued on that board over the hole I drilled in it, and that’s what the eye bolt is threaded through. Also, there’s a bottle cap glued to the underside of the table. That’s so the eye bolt doesn’t grind its way through the table.
On the inside near the back, I have these springs.
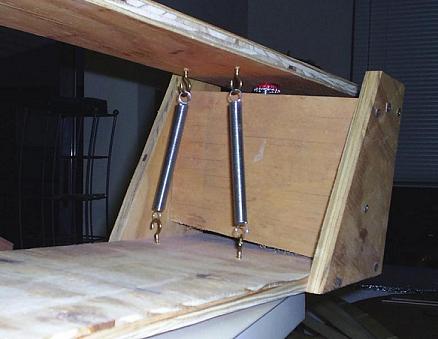
Those provide counterforce to the screw, preventing the table from bouncing, and also reducing any rocking that might happen.
It is very important that your table is square with the bottom of that sander. Otherwise, you’ll have a thick side and a thin side to your laminations. I square mine up by putting the sander in there and raising the table almost until it touches the sander.
That way, the gap is very clear. Then I adjust that wood under the sander, and/or move the sander around, or use shims or wood wedges or whatever until I get it all lined up.
Just to make sure lest my eyes decieve me, when I grind laminations, I run them through forward and backwards. That makes both edges go through each side, ensuring that one edge isn’t thicker than the other edge.
Of course that doesn’t work with tapered laminations, because you can only run those through one way. Well, I take that back. You could always just grind one side, flip it over, and grind the other side. That would have the same effect.
Anyway, there’s some other things you need to know about grinding laminations. First, use 40 grit sanding paper. Using a rough grit like that will produce a good gluing surface. Plus, it’s faster.
Second, you must slide your laminations through at a constant speed. If you do the stop and start dance, you’ll have gouges and grooves from each time you stopped. That means you don’t want it to be a struggle to push your lams through.
It’s much better to make several easy passes then just a few hard passes. Just turn the screw a half turn or so each time you’re ready to go thinner.
Third, to make sure each laminations is the same thickness, I do each one, one after the other, at the same thickness.
Also, I run them each through twice before I go to the next one. The second pass is always easier and takes care of any grooves you might’ve accidentally made the first time.
Fourth, wear a respirator. Grinding lams creates a whole lot of sawdust, and you’ll have your face right in it.
Grind at least until you get all the tool marks out. I start by having the roughest side facing up, which always turns out to be the outside with the glue and misalignment.
I also start with the thickest piece, but I run the others through anyway, just to be sure. Once I have all the tool marks out of one side and mostly out of the other side, I start making tapered laminations.
My first two or three bows used all parallel laminations and turned out just fine. Tapered laminations distributes the flex better and gives you a better looking profile, I think. This is unnecessary, but lemme tell you how I make tapered laminations.
First, I just bought some tapered laminations from Three Rivers Archery. I got the cheapest ones they had, and they had a .001 taper.
That means the laminations is .001 in thinner with every inch in length. Now you just put that tapered lamination under your parallel lamination, and run it through the grinder, thin side first. This is what happens.
Now your lamination has the exact same taper as the one under it. Pretty neat, huh? And if you want a .002 taper, you just put two .001 tapered laminations under it. I’m just going to do a .001 on each of my laminations. That will give me a .002 taper on each limb.
You might want to know the exact thicknesses I’m using for my lams. Knowing that is supposed to give you predictable draw weights. But lam thickness is one of many variables which can be use to predict results.
Other factors affecting draw weight include limb length, riser length, width, and profile. The only way to use lam thickness to predict results on a new design is to experiment.
So grind lams however you feel like, measure the thickness, and record them. Keeping a record of a few different glue-ups will give you an idea of what to expect.
I don’t measure my lam thicknesses. I just eyeball it. So far, I’ve been able to get pretty close to what I’m shooting for, and if I can’t, I’m able to tiller until I do.
But for the purposes of this build along, I measured my lam thicknesses. The tapered laminations are measure from the thickest end. Here they are:
taper lams: 5/64″ or .078″
bamboo lam: 9/64″ or .141″
fiberglass: .050″
Here’s my lams all ground and ready to go.
Well, not quite ready to go. Two are going to go on the belly, and will ride up the fades. The other two will go on the back and will need to be spliced.
Before I splice them, though, I want to make sure I have them oriented the way I want them. I lay them on the form like I want to have them glued up. Then I lable them with a pencil to tell me where they go later.
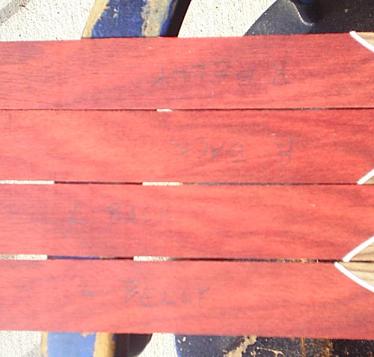
Those pencil marks will go on the inside against the bamboo core, so they don’t show through the glass. In case you can’t read that, they say:
R BACK
L BACK
R BELLY
L BELLY
That helps me keep everything straight.
To splice them, I first hold them together and grind them on the disk sander.
That gives me the same angle on both of them so they fit together.
Then I glue them together. If you don’t glue them together, they will separate when you clamp down on the riser, and that will cause a gap. To glue them together, I use 2 ton epoxy.
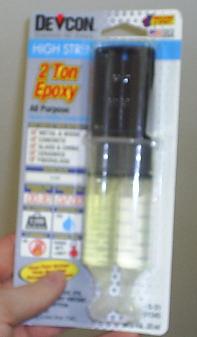
It comes in a double barrel syringe. I suppose you could use the 5 minute epoxy, too, but I like this other stuff because it gives you lots of working time.
You’ve got 30 minutes, and it’s supposed to be cured in two hours and at full strength in eight hours. Two hours is enough to glue it up. I suppose you could also use Smooth On. Don’t use Urac or Titebond II, though. You want something that dries clear.
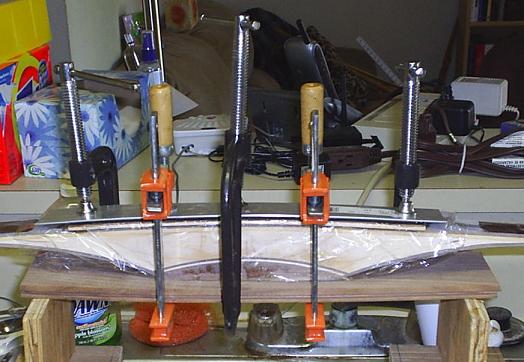
Since the laminations are so thin, I don’t want to have to sand that glue joint too much if at all. So I want everything to be nice and flat. I do that by clamping the joint between two flat sticks of wood.

I wrap wax paper around it so I don’t glue it to either piece of wood. That one on the bottom is long and straight. I use that to make sure my lams are lined up when I glue them together. As long as you unclamp that in about an hour or two, the wax paper won’t stick to it. If you use Smooth On, though, the wax paper might stick to it.
Preparing the Fiberglass
I actually prepared the fiberglass before I did anything else. It’s just that this build along is topical, not chronological, remember? I always prepare the fiberglass as soon as I get it in the mail. You can get fiberglass from Bingham Projects or Three Rivers Archery.
I’m sure there are other places, but those are the two I know about. I get mine from Three Rivers Archery (3RA) because (1) it saves on shipping since I get other things from 3RA, too, (2) it’s cheaper than Binghams unless you buy in bulk, and (3) they don’t give you options like Binghams does.
The reason I don’t like options is because I don’t know enough to choose, and having options stresses me out. I’d rather the choice be made for me. I get it in .05″ because that gives me room to tiller if I want to.
Fiberglass is nasty stuff. It is the primary reason I don’t make many of these kinds of bows. The splinters are harder, they’re invisible, and they’re numerous. You have to be very careful with it.
The fiberglass will come smooth on one side and sanded on the other. You want the smooth side to go on the outside, and the sanded side should be the glue side. The first thing I do is lay it all down with the smooth side up. Then I put masking tape over the smooth side.
The top two have masking tape, and the bottom two don’t. Sometimes I use blue painters tape, because it’s easier to get off later.
But this masking tape I found is even easier to get off than the blue tape. Plus, it’s easier to see pencil marks on it. You see, the masking tape serves two functions.
First, it keeps glue off the fiberglass during glue-up. Second, it provides a surface for drawing your bow outline with a pencil.
Once I have all the fiberglass taped, I find the center mark. They are six feet long, by the way. Remember that I’m making two bows, not just one.
That’s why I have four pieces. Anyway, I want to leave two of them 6 ft long and cut the other two in half. The half pieces are going to go on the belly, and I cut them in half to ride up the fades.
Of course you can design your riser so that the belly fiberglass goes through the riser, in which case you don’t need to cut it in half. But I’m cutting mine in half.
Since there’s going to be about 5.5″ of the riser that won’t have fiberglass on it, some of that fiberglass will end up hanging off the end of my form.
But my hotbox isn’t long enough for that, so I like to cut my fiberglass a wee bit shorter so it doesn’t hang off as far. Instead of cutting the fiberglass in half, I cut out about a 4″ section from the middle. I find the midpoint, then measure two inches on either side.

There are a variety of ways to cut the fiberglass. One way is with a band saw. There’s something you should know about cutting fiberglass with a band saw, though. As soon as the blade hits the glass, you’ll see some sparks.
That’s the blade being ruined. It’s necessary, though, unless you plan to whittle your bow out of the glue-up and destroy your pocket knife instead.
So just sacrifice one band saw blade and use that one blade for all your fiberglass stuff. That way, you don’t destroy all your other blades.
Another way to cut the fiberglass is with a pair of shears. I’ve got these super cool scissors I can cut a quarter in half with. I cut my fiberglass with those one time. The only problem with cutting fiberglass with shears or super cool scissors is that it causes the fiberglass to splinter a lot near the cut.
I use a Dremel tool with a cut-off blade to cut my fiberglass.

That seems like the easiest way to me.
Once I have the fiberglass taped and cut, I turn it all over. There’s going to be dust and stuff on the sanded side, and we don’t want that there, because whatever is on there will show up after glue-up.
So I take a wet paper towels or something and wipe everything down. Then I let it dry. Make sure there are not cat hairs or anything on your fiberglass or any of your laminations. Don’t run your fingers along the sanded side.
The Glue-Up
There are a couple more things you need to do the glue-up. You’re going to need some pressure strips. I use rubber and aluminum.

You could subsitute cork for the rubber. The rubber and aluminum distribute the pressure of the clamps, and keep it constant. The rubber you can get at Lowes or Home Depot. Go to the flooring section, and you’ll see these strips of rubber about four feet long, two inches wide, and with a lip on one edge.
Get two of those, then cut it down to three feet, and cut the lip off, leaving at least an inch and a half width.
You can also get the aluminum at Lowes or Home Depot. It comes in strips where they have the rest of the aluminum and steal strips.
It’s 1.5″ wide, and comes in various lengths. Get whatever turns out to be the cheapest. You can always cut it to size with a hack saw. I got two of them four feet long and cut them to three feet with a hack saw.
Don’t be intimidated. Aluminum is surprisingly easy to cut. Be sure to get it 1/8″ thick. Do not get it 1/16″ thin. That’s too thin and won’t distribute the pressure properly.
Some people also put rubber or cork strips between the bow and the form, but I just put them on top of the bow.
You might want to do a dry run before the actual glue-up. Make sure you have everything laid out like you want it, that you don’t accidentally have the pencil side of the lams showing through the fiberglass.
Once you’ve done the dry-run, some people like to put everything upside down in the hotbox, turn on the hot box, and then take out one piece at a time to apply glue.
Preheating the lams is supposed to help the glue adhere. Preheating is optional, though. I don’t do it, because I had some lams warp on me doing that.
You don’t have to worry about them warping during the glue-up, though, because the clamp pressure will prevent it. Also, remember when we spliced those two lams together? I’ve had those come undone during preheating, too. So I just don’t preheat anymore.
Now let’s mix the glue up. I measure my glue using 3 oz. paper cups. I fill one with glue and one with the hardener.

The cups don’t have to be Mickey Mouse, but it doesn’t hurt. Now squeeze the cups so that you get everything into the blue plastic bowl. When you put it all together like that it sort of looks like the inside of a Cadbury Cream egg. Mix it up really well.
Now tape some wax paper to whatever you’re going to use for a table. I use two pieces of bamboo flooring, and set that on the counter in my kitchen with the form behind it.
Lay some plastic wrap over the form so that it extends past both ends. Don’t use “Sam’s Choice” plastic wrap.
My name is Sam, but it’s certainly not my choice. The stuff is excellent on food, I suppose, but I’ve used it on the last three bows and will never use it again. The stuff comes preloaded with static cling, and then it seems to sort of melt around the bow in the hot box.
Taking it off is like pealing skin from a sunburn. It’s difficult and takes forever. Use something else that doesn’t cling quite so effectively. I use Hy-Top. It’s horrible for food, but it’s great for bows.
Okay, now I want to tell you the procedure I use to glue the bow together. First of all, if you haven’t already done so, you need to find the center of the bamboo and put pencil marks on the edges.
The Different Steps

1 – Lay the six-foot piece of glass on the table. Lay the spliced lams in front of that (closer to you). Lay the bamboo for the core in front of that (closest to you).
2 – Apply glue to the fiberglass. I dab it on with my stirring stick, then use a seam roller I got at Lowes to spread it from end to end. Be sure there are no dry spots.
3 – Apply glue to the spliced lams. Make sure once again that you have them oriented right and don’t glue them on so the pencil marks will show through the fiberglass.
4 – Pick up the spliced lams, flip them over, and put them on the fiberglass so that glue and glue go together. Center it, too.
5 – Apply glue to the other side of the spliced limbs that are sitting on the fiberglass.
6 – Apply glue to the bamboo.
7 – Pick up the bamboo, flip it over, and put it on the spliced limbs, glue on glue. Make sure the center mark on the bamboo lines up with the splice on the spliced limbs.
8 – Apply glue to the other side of the bamboo.
9 – Pick up the whole thing and put it on the form. Make sure the center pencil mark on the bamboo lines up with the center pencil mark on the form.
10 – Apply glue to the underside of the riser.
11 – Put the riser on the form. Make sure the center mark on the riser lines up with the center mark on the bamboo and the form.
12 – Put a folded paper towel on the riser, and use your 6″ c-clamp to clamp it on. With this part, it helps greatly if you have a lovely assistant. One of you can hold both ends of the riser and lams, keeping everything lined up, while the other tightens the clamp. If you don’t have a lovely assistant, there are two other ways. One way is to attach, by glue or screw, some guides along both sides of your form.
They will keep everything lined up. The guides can be aluminum, wood, or whatever. The other way is to just tighten in increments while you keep making minor adjustments to keep everything lined up. You’ll get glue on your hands for sure. What I like to do is put a piece of plastic over the fades so I don’t get glue on my hands, then on the clamp.
Speaking of which, the whole reason I had you put that paper towel on the riser is so you don’t accidentally glue the clamp to the riser.
13 – Lay the right-hand piece of belly fiberglass and belly lamination on the table in front of you.
14 – Apply glue to the fiberglass.
15 – Apply glue to the lam. Make sure you’re gluing the correct side!
16 – Put the lam on the fiberglass, glue to glue.
17 – Apply glue to the other side of the lam.
18 – Apply glue to the right side of the riser fade.
19 – Pick up the lam, flip it over, and put it on the right-hand side of the form.
20 – Repeat steps 13-19, except do it with the left-handed stuff.
21- Wrap the plastic wrap around the bow.
22- Wrap some masking tape around a couple of places on the limbs. That helps keep things from sliding around too much.
23 – Put the rubber on the bow.
24 – Put the aluminum on the rubber.

25 – Start putting on the clamps. I start at the highest spot. Then I work my way to the fades. Be sure to keep checking the alignment. Don’t put too much pressure at first. I alternate from one side to the other. This is especially important when you start applying clamps to the fades, because if you apply them to one side, the riser will slide out of alignment. So apply them with little pressure to one side and the other alternating. Also, be sure none of the plastic wrap gets between the laminations on the fades. I just sort of pull it out as I’m applying pressure.
26 – Once I have all the clamps from the high spot to the fades, I begin tightening them, alternating from one side to the other and going in increments until I have it fairly tight.

27 – Begin applying clamps from the high point to the end on both sides, and tighten them in increments as before.
It’s not necessary to alternate the different sides like I did. I just do that for balance. 28. Now put that in the hotbox and cook for six hours. You can use the c-clamps for handles when you pick it up.
Roughing It Out
I’ll bet you thought “roughing out” was just something people did to selfbows. Nope, it happens with fiberglass bows, too. Maybe they call it something different, though. I don’t know.
Anywho, unclamp it and make sure it isn’t stuck to the form. Then put it back on the form and mark where you’re going to cut the ends.
I’m going to make a 64″ bow, so I’ll make my mark at 66″. Then I’ll cut my nocks one inch from both ends, giving me 64″ nock to nock.
Once I have those ends marked, then I need to make sure my tips are going to be aligned. There are a variety of ways to draw a straight line down the back of a curved bow. I’ll just tell you a few of them.
One way is to use one of those cool lazer doohickies they use to line pictures up on the wall. Stand the bow up against the wall and shine a lazer line on the back. Then trace it.
Another way that is kind of similar is to use the shadow cast by the corner of a building or something. The problem with this method is that the line isn’t sharp enough in my opinion.
Another way is to sand one edge of the bow completely flat. Then lay the bow down on its side on a flat surface. Take a block of wood that, when you lay it down beside the bow, comes to the center of the handle.
In other words, it’s half as thick as the bow is wide. Put that block of wood against the limb on one end and move it all along the back of the bow with a pencil pushed against it.
Another way is to lay a string across the bow from end to end and hang weights off the ends. Then shine a light on it directly overhead. The string will cast a shadow on the back that is perfectly straight, and perfectly aligned.
As for me, I use a template. But to use a template, I still need to do something to make sure the tips are going to be aligned. I mark the center of the handle, and use the string-and-weights method to line the tips up.
I adjust the placement of the string until it lines up through the center of the handle. Then I mark each end of the string. When I place my template on the bow (which has a center line through it), I line it up with the mark on the center of the handle, and the mark on the ends of the bow. Then I trace it.

Now I go to my friend’s house and use, not his 12″ band saw, but my own 14″ band saw. You see, I don’t have room for it at my apartment. My philosophy teacher, wonderful man that he is, gave me a 14″ band saw. He used to make custom furniture, but he doesn’t anymore, so he just gave it to me.
Remember that fiberglass destroys bandsaw blades. So just use one blade for cutting glass so you don’t ruin your other ones.
After I cut it out, I use the belt sander to sand to the lines. Then comes the fun part–taking the masking tape off. Let’s look at the cool part.
Isn’t that neat? As you can see, though, the center of the splice isn’t the same as the center of the limb. I guess I need to work on that.
You see, my zebra wood warped on me back when I glued the splice up in the hotbox, so that made it almost impossible to keep everything lined up.
I guess one solution might’ve been to use lams wider than 1.5″. Then I could’ve sanded them down to straighten out any warpage. You don’t have this problem with straight 45 degree splices.
The warpage caused a worse problem, though.
Do you see that? Look at the top. That’s all glue up there. The only way to fix it is to narrow the limbs, and that will weaken the bow.
It could’ve been avoided by making wider lams or by doing a better job of getting everything to line up.
For example, using guides on the sides of my form would’ve helped. That’s okay, though. Narrowing the limbs will fix that other problem of the splice not being lined up. Isn’t that convenient?
Anyway, let’s worry about that later. Right now, we want to glue on overlays.
Gluing On Overlays
Before you glue on the overlays, you need to sand the tips…
…and the back of the handles.
I say handles with an s because I’m making two bows instead of one. It’s ironic. The other bow lamination isn’t spliced. It’s just zebra wood all the way through, and yet it didn’t have the same problem with warping and glue where wood should be.
I use my handy dandy pneumatic drum sander with a 120 grit sanding sleeve to sand.
The back-of-the-handle overlays must not be longer than the fades. If they are, they will have to bend, and if they bend, they could lift up, being under tensil forces. I make mine 12 inches.
The tricky part is clamping them to the back of the handle, because how are you going to get c-clamps on your curved fades? I solve that problem by setting the bow face down on a board, and putting the clamps on the board.
See that piece of walnut under there? It’s a problem solver.
I also use a piece of rubber and aluminum for pressure strips. I use Smooth-on, wrap the handle in saran wrap, clamp it, and put it in the hotbox for four hours. I leave the lid ever so slightly cracked so that it doesn’t get quite as hot as it did before. I don’t know if it matters or not, but I figure it’s less likely to delaminate that way.
Oh, and I also glue the tip overlays on there. A lot of people who shoot fiberglass bows like to use fastflight strings.
Fastflight strings put a lot more stress on the tip overlays than B-50 Dacron, so you can’t use them with just any tip overlay. If you want to use fastflight, then you should use phenolic, micarta, or something like antler or horn for your tip overlays.
If you use wood, you shouldn’t use fastflight. I’m using wood for the build-along bow, and some phenolic on the other one that my friend gave me–the one who also lets me keep my bandsaw at his house. He’s a great guy!
How I fixed the problem.
That little glue spot was only on one side of one limb, so I figured if I just narrowed the whole bow on that side, it would fix the problem, and not cause any misalignment.
This is just an exaggeration of the basic profile of the bow and how I cut off one edge, making the whole bow more narrow, but not changing the alignment or anything.

I put a piece of masking tape all down the back on the side with the glue. To get the line perfectly even all down the side of the bow, I taped a pencil to a chop stick so that the chop stick would ride along the side of the bow while the pencil tip drew the line on the back.
Oh the cleverness of me! After I drew the line on the masking tape, I cut it out with the band saw and then sanded to the line.
Not only did it fix my glue problem, but it also caused my splices to be centered in the limb better. Two stones with one bird! I love it when everything comes together!
Doing the Handle
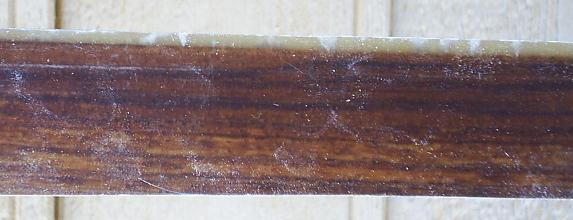
The next thing I did was cut an arrow shelf with the bandsaw. Stupid me cut past center like I told you not to do earlier, and now you can see the glue line from where we glued the two pieces of maple together. The secret is exposed.
Then I radiused the shelf with the disk sander on my belt sander. After that, I drew a curve where I wanted to cut out my contour and cut it out with the band saw. Here’s what it looked like so far:
Do you see all that black stuff on the side? That’s the burn from the band saw blade because after cutting a lot of glass with it, it’s completely worn out and dull. These burn marks will come out with sanding and rasping though.
Next, I shaped the handle first using the belt sander to get it roughly rounded, then rasps to fine tune it, then a file to smooth out the tool marks left by the rasps. Here’s how it looked then.
Checking alignment
Now I cut the nocks, but nothing to see there that you haven’t seen in Making an Ipe Bow, part 5. Then I string it up and check the alignment.
Once I’m happy with the alignment, I narrow the tips to where they are 1/2″ at the beginning of the overlays, making sure to take the same amount from each side so it stays in alignment. I use the belt sander to narrow the tips.
Once the tips are narrowed, I check alignment again. If that’s alright, I go ahead and shape the tips with the belt sander and a file. When I give the tips their final shape, I cut them shorter. I leave them long enough to use a stringer, though.
Sanding the Fiberglass
Now I sand the fiberglass. That’s right, you have to sand the fiberglass. I don’t know why, but you do.
Fiberglass is nasty stuff. If it gets in your clothes, and you put your clothes in the laundry, you could be itching for a month. To prevent that, I have a designated long-sleeve shirt that I never wash. I just put it on over my t-shirt, put on gloves, and put on a respirator, and do my work. When I’m done, I turn the shirt inside out and stow it somewhere for the next time I do fiberglass.
Sanding fiberglass can be tiresome, so I start out by using my cool inflatable drum sander I showed you earlier, and I use a 120 grit sanding sleeve on it. It sometimes leaves a line down the middle of the bow that isn’t sanded, and I go over that by hand with 100 grit sand paper. Here’s what it looks like after being sanded:
Pretty cloudy, huh? After I get it completely cloudy, I string it up and check the tiller.
Tillering
One of the nice things about fiberglass bows is that it requires practically no tillering at all. You can just string it up and pull it back.
Usually, the first time you string it, it’s already tillered. Sometimes, you might want to weaken the top limb just a tad to get a positive tiller. You can do that by tillering from the sides with your belt sander. Be sure to round the corners, by the way.
As for me, I use my cool inflatable sanding drum. That way, I can tiller from the back and belly, and I can change draw weights.
Being inflatable, it’s much smoother than a belt sander. I don’t think I’d want to use the belt sander on the surface of the glass.
Sanding the Rest of the Way
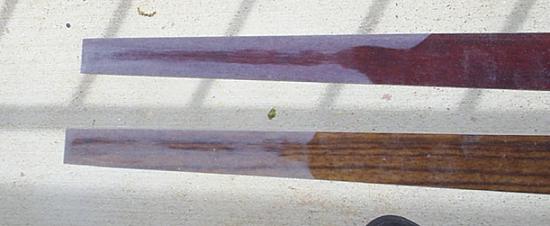
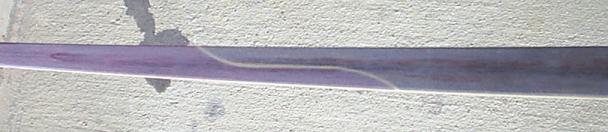
After it’s tillered, I continue to sand the fiberglass by hand. I use 220, then 400, then 1000 grit. After that, it looks like this:
And then after putting a finish on it, it looks like this:
But we’re getting ahead of ourselves.
I also sand the handle and the tip overlays. To sand the handle, I start with 100 grit, and I use a lot of that so as to get out all the marks and imperfections. Once that’s done, the rest of the sanding goes pretty quick.
Finishing Up with the Finishing Up
The last things to do are to apply your favorite finish, put something on for an arrow rest and a strike plate, and go shoot it. Sometimes when you put your favorite finish on, you’ll notice white streaks in the fiberglass. This especially shows up when you use darker woods.
From what I hear, just about all fiberglass has this, and it doesn’t cause a structural problem. It only causes an aesthetic problem.
If you have air bubbles under the glass that usually won’t cause a problem either unless they’re just enormous. Air bubbles are uglier than those streaks, though, because they show up better. This bow has some little white lines, and I’m not sure what they are.
They don’t look like the ordinary streaks that usually run down the length. But they don’t look like air bubbles either.
The other bow came out perfectly, though. Maybe I should’ve used the other one for this build along. It didn’t have any problems like this one had with the sliding lamination and the ugly fiberglass.
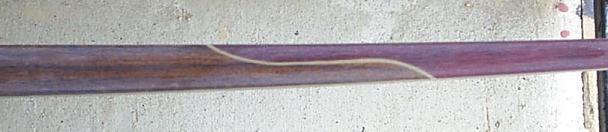
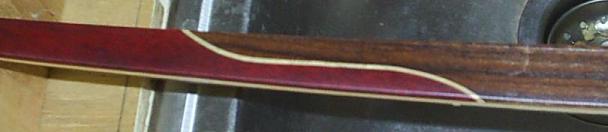
Anyway, here’s some pictures of the finished bow.
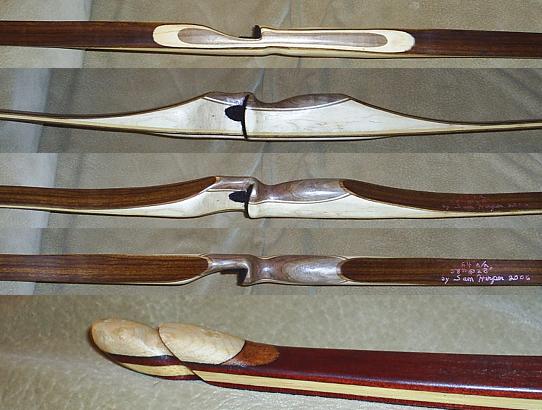
Those tip overlays are birdseye maple and mesquite. Now you might be wondering why I’d use birdseye maple in the tips and then plain ole ordinary maple in the handle. That’s because I didn’t have a piece of birdseye maple that was big enough for the handle.
I think this probably would’ve looked better if I had put another curved accent on the other side. That’s just too much maple and not enough walnut in my opinion.

There’s so little contrast between the bloodwood and the zebrawood that the spliced limbs were almost a waste of time. If not for the maple accents, you might not be able to notice the splices at all in these pictures.
Oh well, it was a learning experience. Next time I’ll either use brighter zebrawood or a different combination of woods altogether (which is more likely).
Finally, Here’s a Full Draw Picture

Length: 64″ nock to nock
Draw weight: 58# at 28″
Disclaimer: Sam Harper owns the rights to this article’s images and written content.