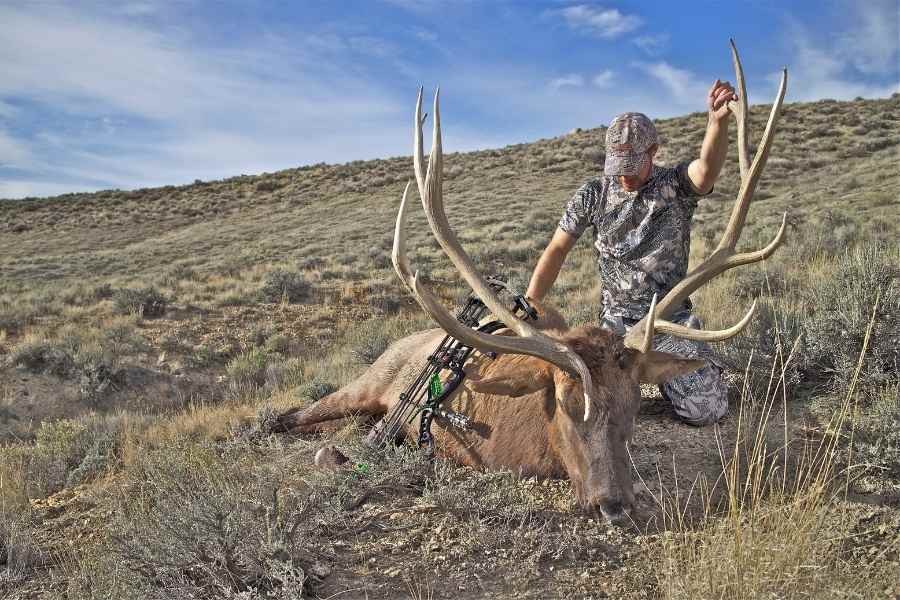

So, you’re on the hunt for the perfect beginner bow, huh? Well, you’re in luck. We’ve done the legwork to bring you the top five compound bow packages that won’t break the bank and will also stick with you as you progress from a novice to a seasoned archer. I know looking at all the fancy, expensive bows in the shop can be intimidating when you’re just starting out with bowhunting. But don’t worry! You don’t need to spend a ton of money to get a great beginner bow that will allow you to have fun and be successful on your first hunts.
Many top bow companies make excellent entry-level and intermediate models that are accurate, powerful, and very affordable. We’ve not only compiled this list of those, but we’ve also done you one better – we’ve personally tested each and every bow on this roster. That’s right, we’ve taken these bad boys out for a spin, tested their mettle, and are now ready to present you with the lowdown.
My Top 5 Picks for the Best Compound Bows for Beginners:
1. BEST STARTER OVERALL – Diamond Edge 320. Great range of adjustability that is quite impressive, featuring a variable draw length of 15”-31” and a draw weight range of 7-70 pounds. The very best beginner compound bow package for adults!
2. RUNNER UP – Bear Archery Cruzer G2. This bow’s construction is par with almost any bow found at the premium price point. Draw length of 12”-30”, and a draw weight range of 5-70 pounds.
3. GREAT VALUE- BlackOut Epic. The fastest bow on our list – 340 fps. Very well balanced and has a possible let-off percentage of up to 90% – One of the best bow for beginners.
4. HIGH END – Bear Divergent EKO. This bow manages to combine lightning-quick performance, compact design, and previously unheard-of adjustability into a single package. A great hunting bow!
5. LIGHT BOW – PSE Uprising. Draw weight range of 15-70 lbs and a draw length range of 14-30 inches. Weights in at only 3.2 lbs.
Did you know that according to a comprehensive research study funded by the Multistate Conservation Grant Program, 88% of bowhunters begin before age 35?
- 39% of bowhunters first started before age 18
- 28% first started between ages 18-24
- 21% started between 25-34
- 8% started between 35-44
- 4% started at age 45+
We’re taking this broad spectrum into account to ensure that we meet the needs and preferences of this diverse community of ‘new’ bowhunters when evaluating and recommending bows. We don’t recommend purchasing a high end flagship bow with state of the art technology. Fact of the matter is that modern bows are miles ahead of what we used to shoot in the 1980’s, 1990’s, and even the early 2000’s. Your dollar spent in the first $400-600 gets you so much further than it used to. Modern mid-range bows are value packed and it can be hard to pick one from the list, so let’s start with number one:
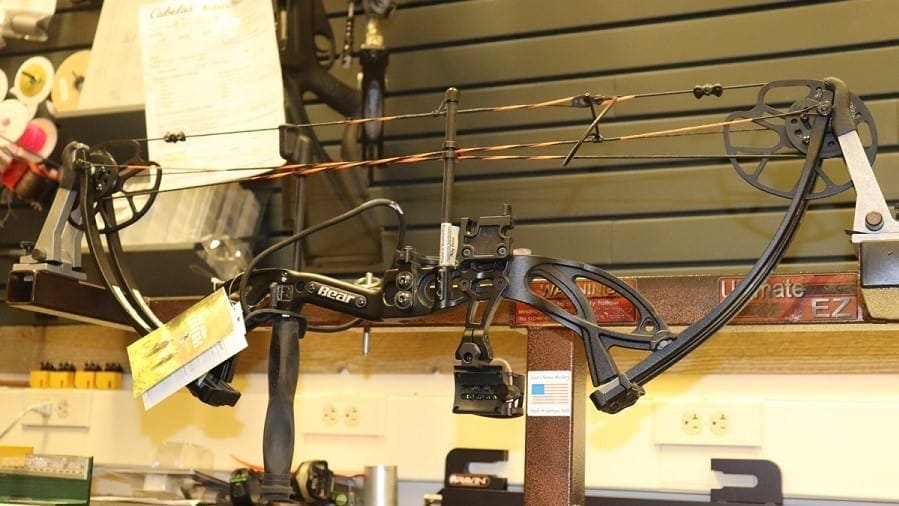
1. Best Compound Bow for Beginners: Diamond Archery Infinite Edge 320

Diamond Archery has been around since 1996 and was originally a privately owned bow manufacturer. In the late 2000s, they were acquired by Bowtech. They are well known for their beginner friendly hunting bows.
When I first handled the Edge 320, I was impressed by its fit, finish, and balance at the price point. After its draw length and draw weight were adjusted to my specs, I started sending arrows downrange. What I first noticed was the smooth draw cycle. The rise to peak draw weight was even throughout the cycle, and the bow transitioned naturally into the valley settling into the back wall. One thing to note was the solid back wall and the 85% let off. I could hold the bow at full draw without it being uncomfortable – an almost effortless hold with a solid back wall at this price point is a fantastic value. This is especially helpful for beginners, as it makes it easier to maintain proper form and make use of your bow sight without getting too tired too early.
Diamond Infinite Edge 320 Specs:
- Draw Length: 15″-31″
- Draw Weight: 7-70 LBS
- Speed: 320 fps arrow speed
- Brace Height: 7 1/4″
- Axle To Axle: 32″
- Bow Weight: 3.6 LBS
- Let-Off: 85%
Time to Send some Arrows down the Range
After releasing a quiver full of arrows I came to realize there wasn’t any real hand shock. This was a pleasant surprise, especially for this price point. My time at the range had me searching for a bad thing to say about this bow but I just couldn’t find it. If we were to compare this to modern day flagship bow of, say, Matthews then yes I could complain. But we’re talking about a ~$400 dollar fully kitted bow ready to shoot. The technology, fit, and finish you’re getting from this bow blows my mind.
Accessories
The compound bow accessories offered with this bow are sufficient for any beginner. Assuming you fall in love with the sport like I have, you’ll probably want to replace the sight and the quiver. Whats provided to you isn’t high end, it just gets the job done. But maybe that’s all you need? Who am I to judge.
If you purchase this bow, Diamond provides a bow sight, arrow rest, stabilizer, and quiver along with it. They call this “RAK” which stands for “Ready, Aim, Kill”. If only it were that easy, eh? You do need to buy a release and arrows, though as these are not included.
Summary of the Infinite Edge 320
Diamond’s Edge 320 is a highly versatile bow with awesome arrow speed, a smooth draw cycle, and all the accessories a beginner needs to get started. As with most packages, arrows and release are not included as these are more personal and need to be chosen by the shooter according to their preference and size.
When you factor in the Edge 320´s blistering 320 fps IBO., its light weight of 3.6 LBS, and its adjustability, you are looking at a steal of a deal. In my opinion, this is one of the best bows on our list – no matter if you are a target shooter or plan to go hunting. If you are really interested in this bow, read out more detailed hands on review of it here.

2. The Runner-Up: Bear Archery Cruzer G2
Bear Archery is another trustworthy brand known for its innovative and quality-focused approach. The G2 has received a lot of praise and our review mirrors that. Like the first bow on our list, the G2 has a nice wide range of draw weight. You will likely start with a more moderate draw weight as a beginner. As you gain experience and strength, you want to increase draw weights to the next level. With a little bit less speed, and a smaller amount of let off the G2 still shines at number 2.
Specs:
- Brace Height: 6.5”
- Let-Off: 70%
- Axel-to-Axel: 30”
- Draw Length: 12”-30”
- Draw Weight: 5-70 lbs.
- Speed: 315 FPS
- Bow Weight: 3 lbs.
Its draw length and draw weight adjustability offer such a wide range, this bow is great for young archers that need a bow to grow with. The all-aluminum riser and its split limbs are some of the toughest in the industry and should be able to survive those slippery youthful hands as well.
I really like that no bow press or specialty equipment is needed to make any necessary adjustments to change the draw weight or draw length of the Cruzer G2. A simple set of Allen wrenches is all you need! This is huge for the young archer, as you’ll likely be tuning this thing every year to account for the growth in arm and general body length.
Let’s Send Some Arrows Down the Range
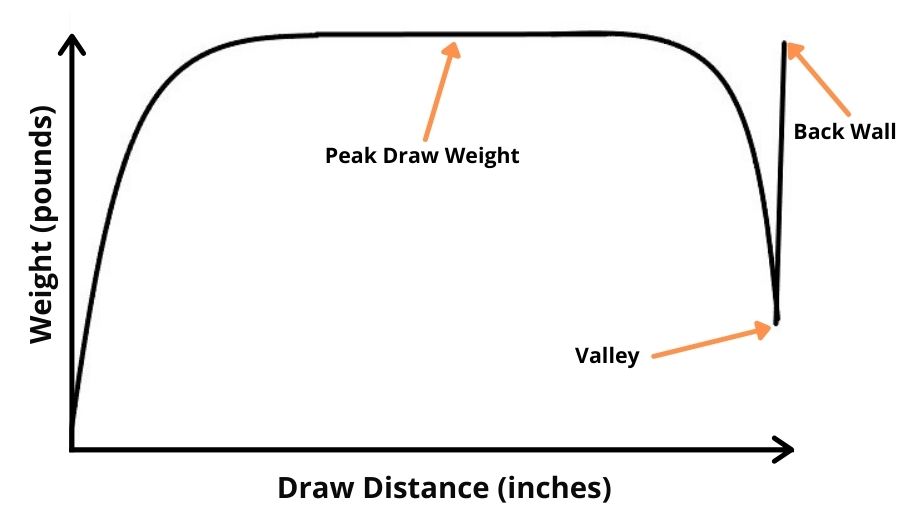
Right out of the gate when you pick this thing up you’ll notice how lightweight the bow really is (3 lbs!!). The draw cycle and how smooth the cams actuated made it almost impossible to tell when I had broken into the valley. If you are unfamiliar with a draw curve, take a look at the following chart:
That back wall felt not firm nor spongy, it was just.. there. I prefer a very solid back wall to settle into so this left me feeling a little conflicted. I have to say that this is purely my personal preference and you may not mind. The G2 offers a let-off of 70%, which is less than what other modern compound bows offer. 15% less than the Diamond Edge 320.
After sending a handful of arrows down the range I can say this: the G2 is quiet! It draws smooth and is easy to hold because it is so light weight. When I needed to make my micro adjustments to tune it was easy to do. I did wear out my draw arm faster because of that 70% let off but all I needed was a longer break to account for it.
Accessories
In many bow packages the featured accessories are mainly beginner grade at best. That doesn’t seem to be the case with the Cruzer G2. The G2 comes complete with a full range of Trophy Ridge accessories. Trophy Ridge makes excellent bow accessories and this is definitely an upgrade from unbranded accessories we typically see on packaged bows.
This Cruzer G2 bow package includes a four-pin sight, Whisker Biscuit arrow rest, 5-arrow quiver, stabilizer, peep sight, and a D-loop. As with most packages, arrows and release aid are not included. You’ll have to pick these out yourself according to your body size and preference.
Summary of the Bear Cruzer G2
Bear’s Cruzer G2 is the compound bow I tested that offers the most flexibility regarding draw weight and draw length. I like how lightweight the bow is and how quiet it shoots. The backwall leaves something to be desired and the lower percentage let off may leave some hunters second guessing a purchase but if you need a bow for your son this is a great option. The accessories are top-notch, including the four-pin bow sight. It’s hands down better than the cheap no-name amazon bows you’ll be tempted to purchase. If you want more info and details check out our in hand review here.
No products found.
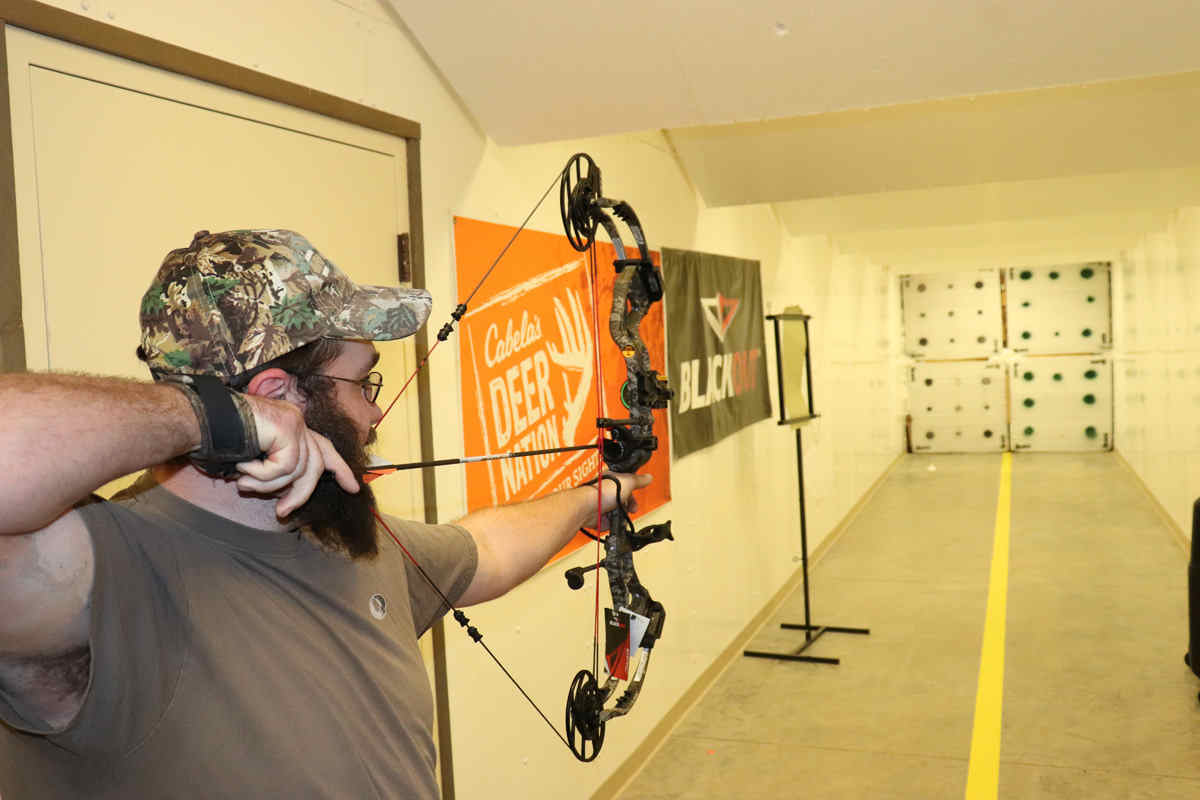
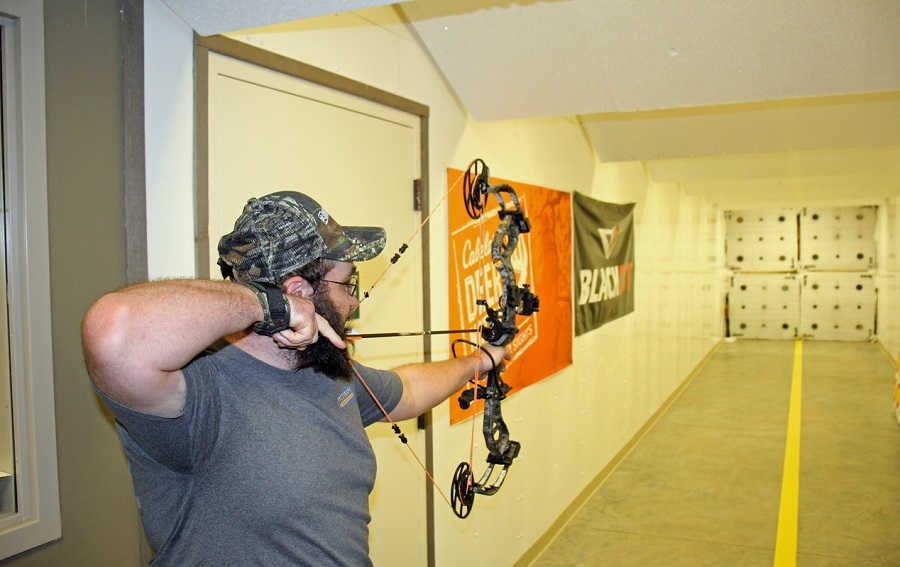
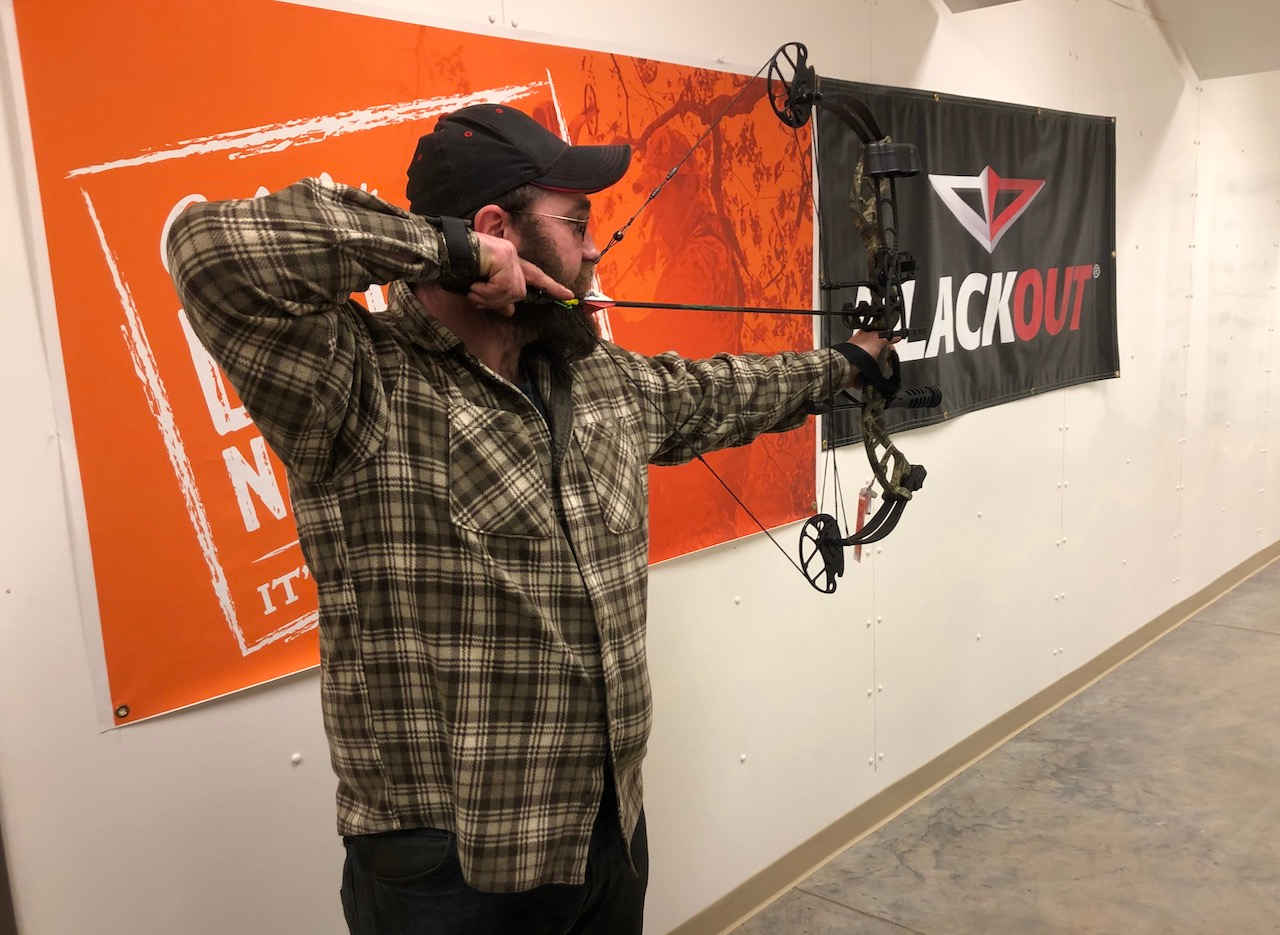
3. A Great Value Bow for Beginners: BlackOut Epic
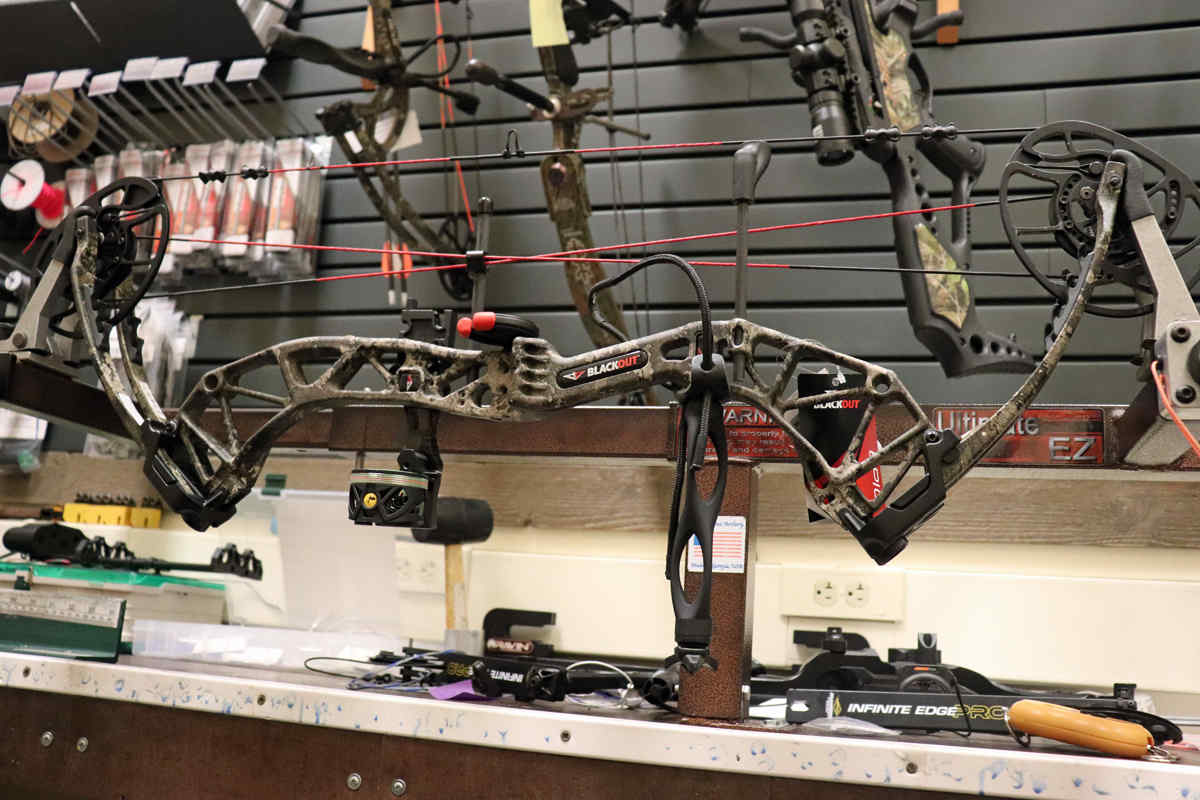
Bowtech Archery actually manufactures the BlackOut Epic for Cabelas / BassPro. If you know anything about Bowtech, you’ll quickly figure this medium-priced bow has features you’d expect from a more expensive bow. The Epic could be considered BlackOuts flagship bow. The bow’s advertised weight is 4.1 pounds, which is heavier than most other bows on our list. Even though it’s a pound heavier than the G2, I was pleased to find it wasn’t hefty or awkward holding it in my hand. Four pounds is a pretty average weight for a bow, and my experience tells me that extra weight may help absorb shock making the bow quieter and dead in the hand. In my opinion, this bow ranks among the top five choices for the best starter compound bow.
Specs:
- Brace Height: 6”
- Let-Off: 75%, 80%. 85%, 90%
- Axle-to-Axle: 32”
- Draw Length: 26”-30”
- Draw Weight: 45-60/55-70 LBS
- Speed: 340 FPS
- Bow Weight: 4.1 LBS
The Epics draw length ranges from 26″ – 30″ and is a good fit for most adult archers and may be a good fit for some older teens. Make sure to measure your draw length before purchasing! Typically a longer axle-to-axle, like this bow at 32″, ends up being more forgiving.
One thing to mention, especially if you’re a beginner. The Epics brace height is short at 6″. Longer brace heights (around 7″) tend to be more forgiving especially for beginner archers. So expect a steeper learning curve if you are a novice.

The shorter brace height makes the bow more challenging for new archers, but I believe its positive features, such as its reasonable price, performance, and quality of accessories, outweigh the negatives by far.
Two style limb weights of this model are available. This is something you must consider before buying this bow. In my opinion, the 45-60 lbs limb style is aimed more at female archers or children. 60 Pounds has plenty of energy to take down a deer, or even an elk but if you can very comfortably pull at least 55 pounds of limb weight I’d advise purchasing the 55-70 pound version so you can go over 60 lbs if you need to. Let-Off is available in four different settings as well: 75%, 80%, 85% and 90%.
Time to Send some Arrows down the Range
The draw cycle is smooth, and there were no hard spots or hesitations when pulling to full draw. I had the epic set at 90% let-off, and it was the easiest bow to hold at full draw I had tested so far. Each release was crisp, and despite the bow’s lightning-quick speed of 340 fps, the sound was quiet. Nothing much was heard upon release except when the arrow hit the target. The perfect hunting bow?
Putting the cam at 90% let off does decrease the efficiency and therefore the speed of the bow but these are the sacrifices and trade offs you’ll have to decide on for yourself. What’s great about this bow is you can make those changes and play with the tradeoffs to account for the style of hunting or shooting you plan to have.
Accessories
Besides arrows and bow release, all the necessary accessories are included
- Volt 5-Pin Sight
- 5-arrow quiver
- Whisker Biscuit arrow rest
- 6″ stabilizer
- TruPeep
- D loop
The sight features hi-vis fiber optic pins and a convenient aiming level. It has 5 pins for covering significant distances. The arrow rest is a containment-style rest that securely holds the arrow.
Summary of The BlackOut Epic
BlackOut Epic isn’t as adjustable as some other bows on my list, and the shorter brace height might present a greater learning curve for beginners. With that said, this bow is a modern compound bow I still would recommend for beginners. Here’s why: I found it affordable, the quality and form factor is excellent, it has a lot of speed (up to 340 fps), and it’s loaded with a bunch of accessories. If you want a deep dive into this bow be sure to check out our review.
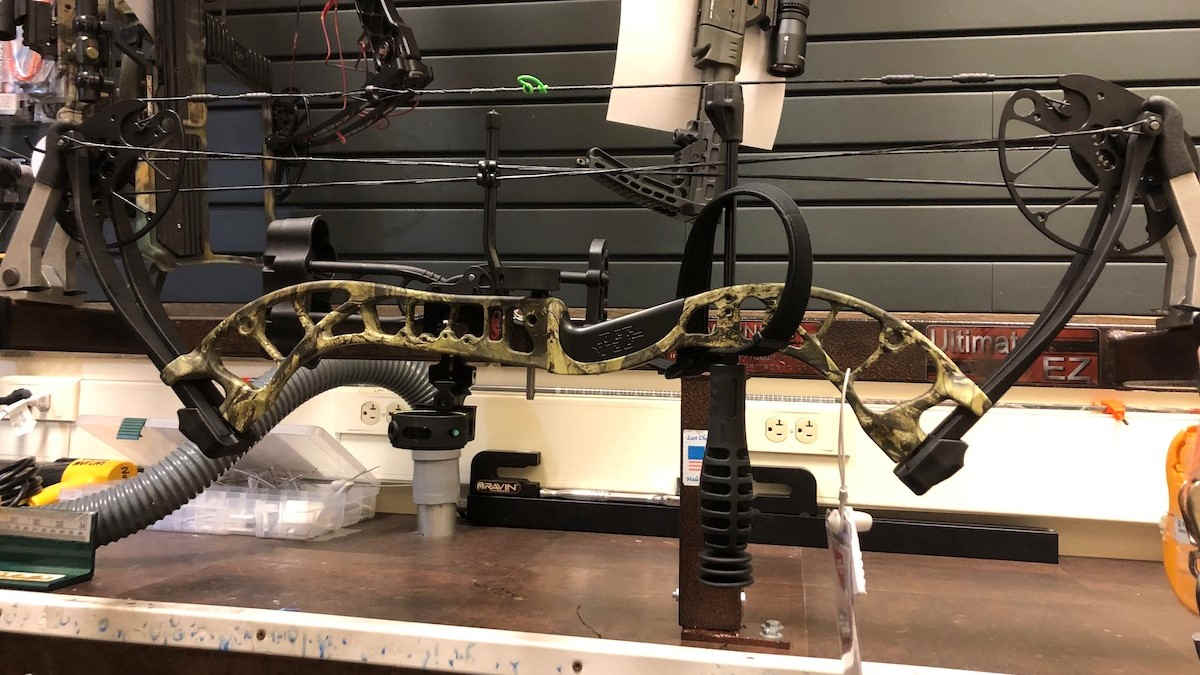
4. The High End: Bear Divergent EKO
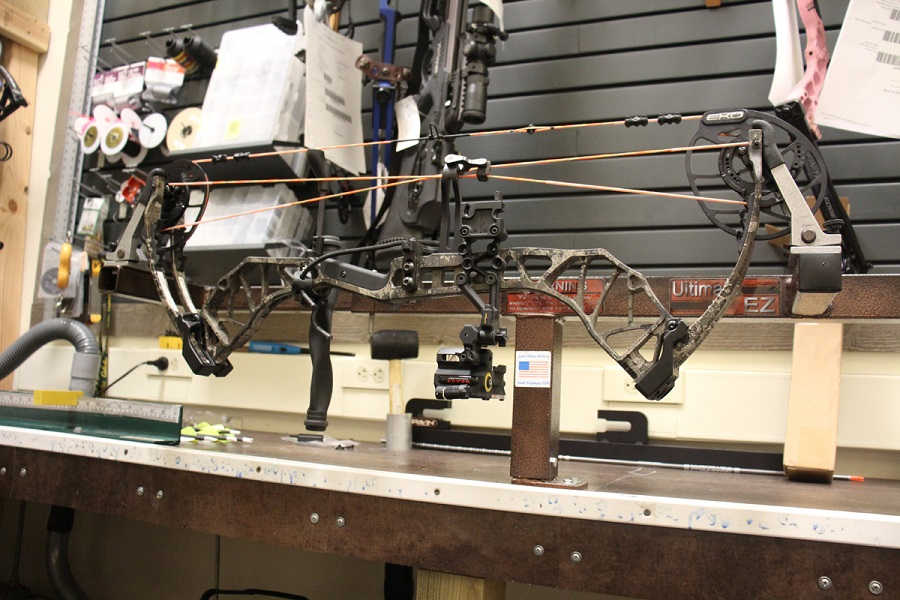
The Bear Archery Divergent EKO is a powerful bow with up to 338 fps and an adjustable let-off beginning at 75% up to 90% offered in 5% increments. Adjusting the bow’s various let offs is as simple as rotating the hybrid cam’s module and cable stops and doesn’t require a bow technician or bow press.
This bow combines speed with adjustability and a compact design into a single package. If you are an adult beginner, this bow truly is for you as it offers everything a seasoned archer or hunter would be looking for as long as you can stomach the price point.
Specs:
- Brace Height: 6.5”
- Let-Off: 75%, 80%. 85%, 90%
- Axle-to-Axle: 30”
- Draw Length: 26”-30”
- Draw Weight: 45-60/55-70 LBS
- Speed: 338 FPS
- Weight: 4.1 LBS
Maybe you have noticed, that the Blackout Epic and the Divergent EKO have almost identical specs? Well, almost: brace height for Bears model is 6.5″ and for the Epic it´s 6″. No big deal you might think, but if you are a beginner, longer brace heights are easier to handle / are more forgiving.
This bow is available in two versions: 45-60 lb limbs and 55-70 lb limbs.
Time to Send some Arrows down the Range
Bear Divergent EKO – silky smooth draw cycle — and Fast!
Once I held the bow in my hands, I noticed how striking this bow is visually – the riser has a sharp look to it that I love. It’s a compact 30″ bow with a great look to it. When I first pulled the Divergent EKO back, I noticed that the action was silky smooth. After letting go, the true performance of the Divergent was obvious. The release of the arrow and its impact with the target was simultaneous at 20 yards and was nothing short of impressive. If any hand shock was noticeable it was negligible. Bears shockwaves limb dampening system at its finest!
This bow shoots FAST with a listed IBO of 338 I was impressed with how quiet it still was and how limited the hand shock is. You don’t need a bow press to work on and like the previous bow we reviewed the let-off is adjustable from 75% up to 90%.
Accessories
If you purchase this bow you have the option of buying the kit (it will be labeled “RTH”). Assuming you purchase the RTH version, the accessories are all high quality! The accessorized bow includes a sight, whisker biscuit arrow rest, 5-arrow quiver, stabilizer, and peep sight. The site included is a Trophy Ridge React H4 sight – a well known sight suitable for any archer of any skill level. As usual, neither the arrows nor the release is included in this package.
Summary of The Bear Divergent EKO
With a draw weight of 45-60 lb/55-70 lb and an adjustable draw length of 26″-30”, this bow will suit most adults but likely not kids. Also the Brace Height of 6.5” makes this bow a perfect beginners compound bow! The compact platform and hybrid cams ensure excellent shootability and will make it a solid hunting bow.
If you don’t mind spending a little more, the Bear Archery Divergent EKO is the perfect bow for beginners. It gives you tons of room to grow and is a full-grown bow that even experienced hunters would love to call their own. For a more detailed review click here!
No products found.
5. A Lightweight Bow: PSE Uprising
PSE’s company history dates back more than 50 years, and it’s produced a lot of industry-standard bows during that time. the PSE Uprising is another bow in their long ling of success. This bow weighs only 3.2 lbs while measuring 30″ axle-to-axle. Getting a feel for the Uprising’s compact size was a real treat.
Specs:
- Brace Height: 6 ⅝”
- Let-Off: 70%
- Axle-to-Axle: 30”
- Draw Length: 14”-30”
- Draw Weight: 15-70 lbs
- Speed: 302 FPS
- Weight: 3.2 lbs
As you may know by now, the closer a bow’s brace height is to 7″, the more forgiving it will be to shoot. With a 6 ⅝” brace height, the PSE Uprising has the most forgiving brace height of all the bows we’re reviewed yet. With an IBO speed rating of 302 FPS, the Uprising doesn’t wow us with speed. Nevertheless, this speed is plenty for almost any application – whether target shooting or hunting. 15-20 years ago that was the fastest bow you could should anyway, so try and put that into context.
Time to Send some Arrows down the Range
While it’s not my favorite bow of the bunch, the price is hard to argue with for what you get. A fully kitted bow, pretty minimal hand shock, pretty quiet, and a no bow press needed adjustable bow makes this a pretty sweet offering. If you force me to pick apart this bow I’ll tell you the max let off of 70% is not great and the grip is very minimal and leaves my hand wanting. This bow blows the cheaper unknown brand crap you can find on the internet out of the water, so don’t be tempted to spend those dollars on an unknown brand with failing quality assurance.
Accessories
The PSE Uprising comes with a number of accessories, including a 3-pin sight, arrow rest, stabilizer, wrist sling, and peep sight. Are you getting the best of the best here? No. But you’re also not spending alot of money and we can’t have everything if we’re on a shoestring budget.
Summary of the PSE Uprising
After testing and assessing the PSE Uprising, I must say I was impressed. The bow has a lot to offer for its price point. This bow is easy to adjust to almost any archer due to its adjustable draw weight/draw length and shoots well. You’d be hard-pressed to find a lighter, more compact compound bow at this price point and with this brand name standing behind it. If this ticks all your boxes, I have no problem standing behind this bow as a perfect start. If you want an even more detailed review of the PSE Uprising be sure to check out our dedicated review here.
Choosing The Best For You
The best compound bow for beginners isn’t the same for experienced archers. Beginners typically benefit from a bow that offers ease of use, forgiveness in shooting, and adjustable features to accommodate their learning curve. Any of the bows we’ve listed here will get the job done for you and kill anything in North America with ease. Choosing just comes down to which sacrifice your willing to make and what you value most.
Hopefully I’ve given you a good start and helped narrow down which bow is best for you. If any of the terminology I’ve used here is new to you, or maybe you wanna get a little more detailed on a term, be sure to get up to speed on our tips for buying your first compound bow.